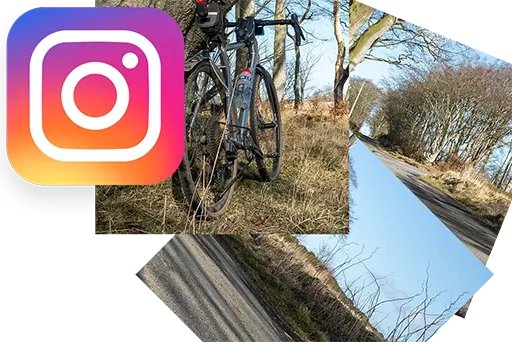
How To Add White Background for Instagram in Lightroom
Recently, I’ve noticed a few users, particularly photographers, have their images set on a white background for Instagram. There are a few reasons for doing this – the white background sets off the image nicely with a border, and it also removes the restrictions on image ratios that Instagram imposes.
I looked for a convenient way to do this directly from Lightroom, but most of the solutions I found used the ‘Print’ function to add the background, and were quite unwieldy. What I was looking for was a one-stop Export preset that would do all this for me.
Enter ImageMagick
ImageMagick is a command-line application for manipulating images. It’s basically Photoshop for the command line, and has many features, including resizing, changing colour depth and format conversions. The Photographer’s Toolbox makes a plugin called LR/Mogrify 2 that encapsulates and exposes the capabilities of ImageMagick in Lightroom.
The plugin is ‘donationware’ in that it is fully functional, but has a limit of 10 images in one export. Donating to the project on the Photographer’s Toolbox website will provide you with a serial number to remove this restriction.
Installing the Plugin
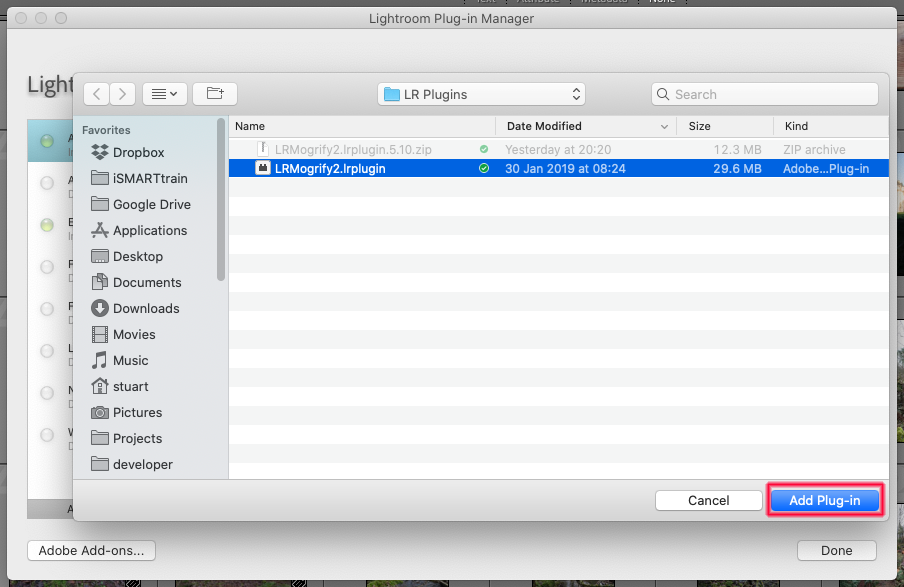
To install the plugin, open the zip file and move the plugin file to somewhere convenient. I put mine in an ‘LR Plugins’ folder in my Pictures folder.
Next, In Lightroom, select Export from the File menu and click on Plug-in Manager… button at the bottom of the Export dialog.
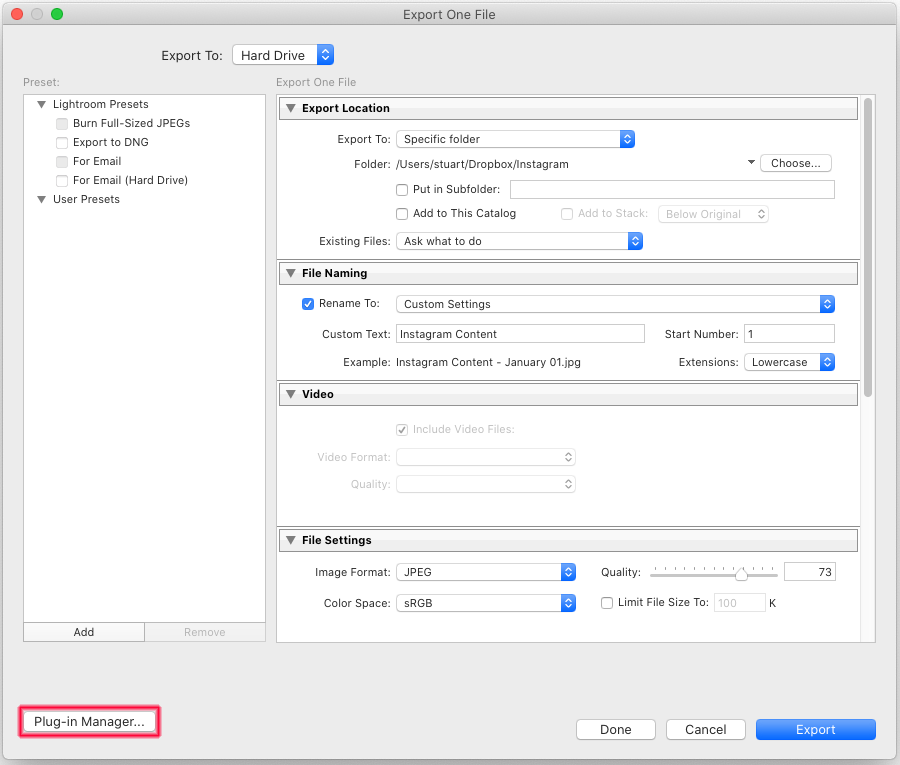
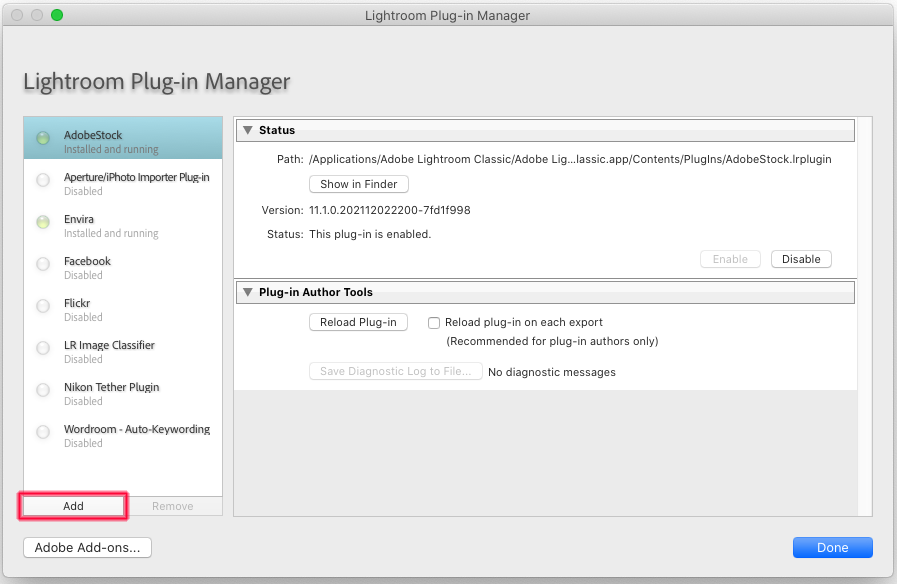
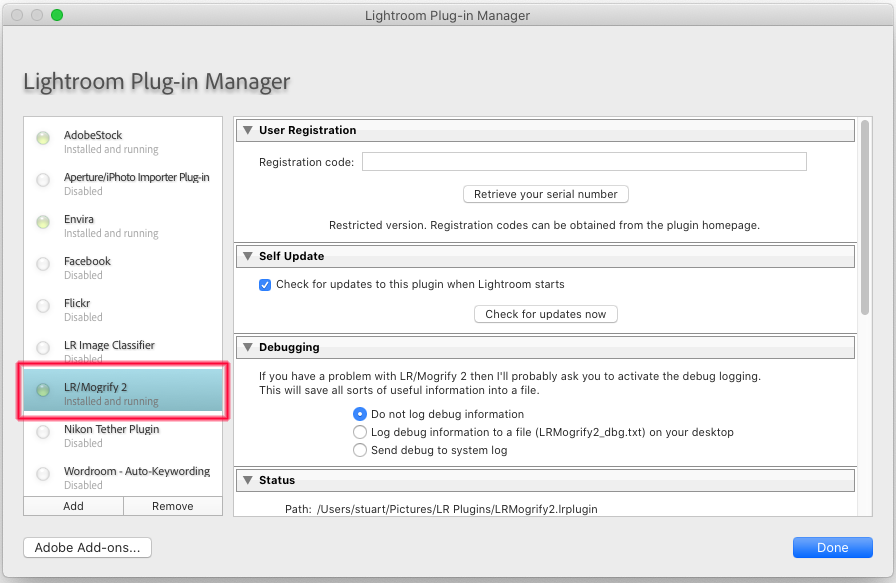
Click the Add button and navigate to where you’ve put the LR/Mogrify 2 plugin. Select it, and click the Add Plugin button. You’ll now see the LR/Mogrify 2 plugin shown in the Plug-In Manager dialog. Click the Done button, and you’ll be returned to the Export dialog.
You’ll now see the various ImageMagick options for LR/Mogrify 2 appear in the Export dialog.
Create a New Preset
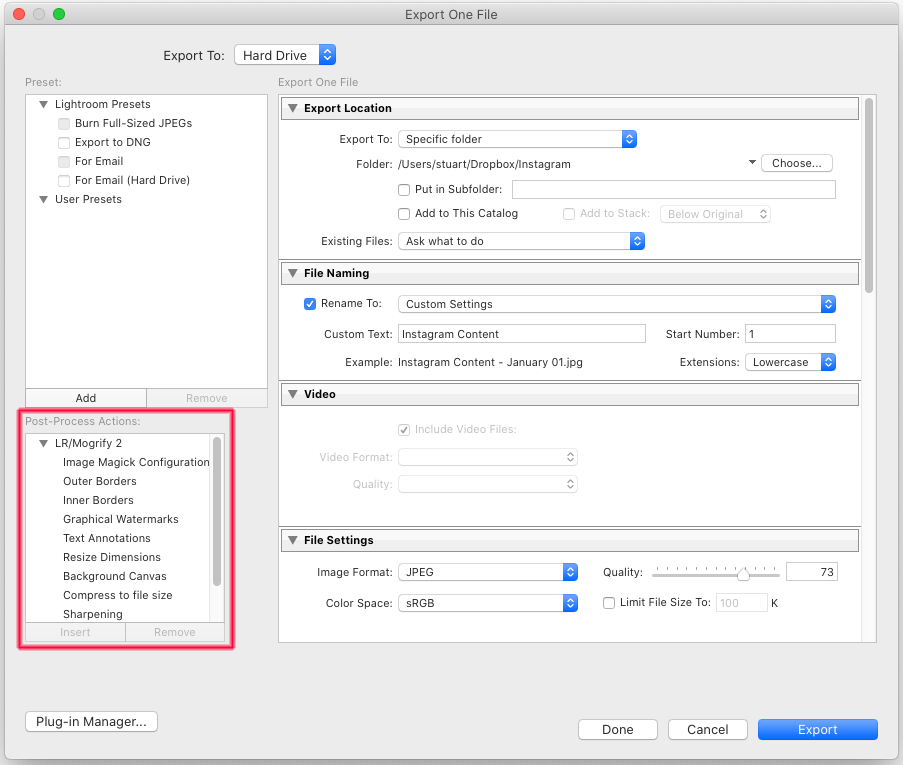
The LR/Mogrify 2 plugin can do loads of things using ImageMagick – the Photographer’s Toolkit webpage has details of these. Here, though, I’ll focus on the settings I use to add a white background to my Instagram images.
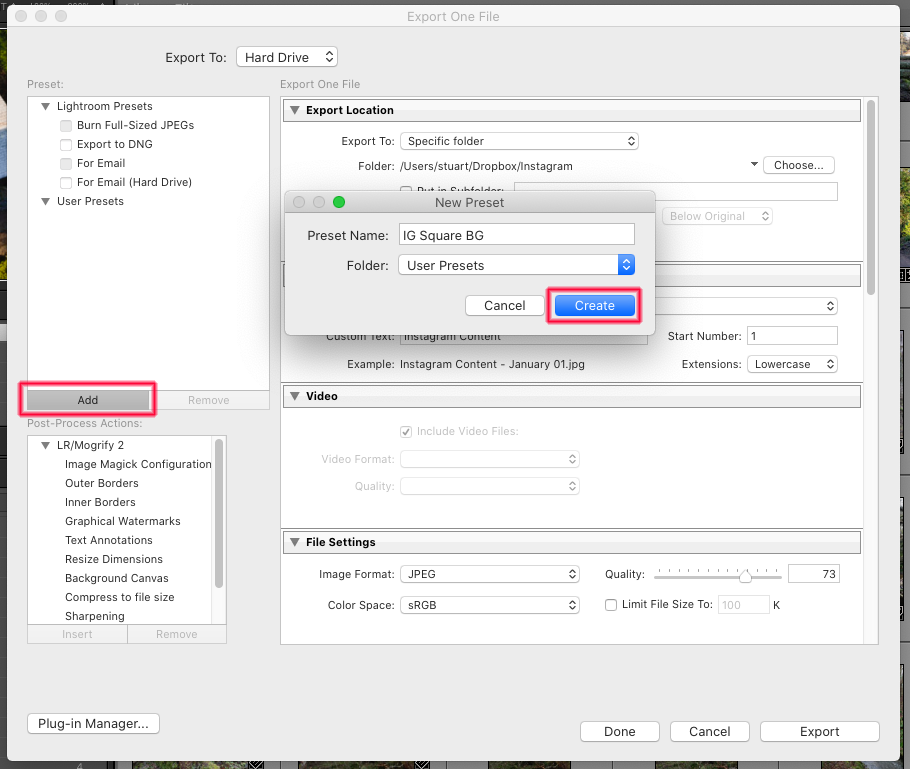
I’ve added a new plugin called IG Square BG, using the Add button. For the top couple of sections, I’ve set the plugin to save the exported file into a specific folder, and to give it a name based on the file date with a sequence number. This is just my personal preference, and you’re free to use whatever suits your workflow here.
You’ll need to add the Background Canvas action to your preset. Do this by selecting your preset, then selecting Background Canvas in the Post-Process Actions List, and clicking the Insert button. You’ll see the Background Canvas options appear in the preset settings panel.
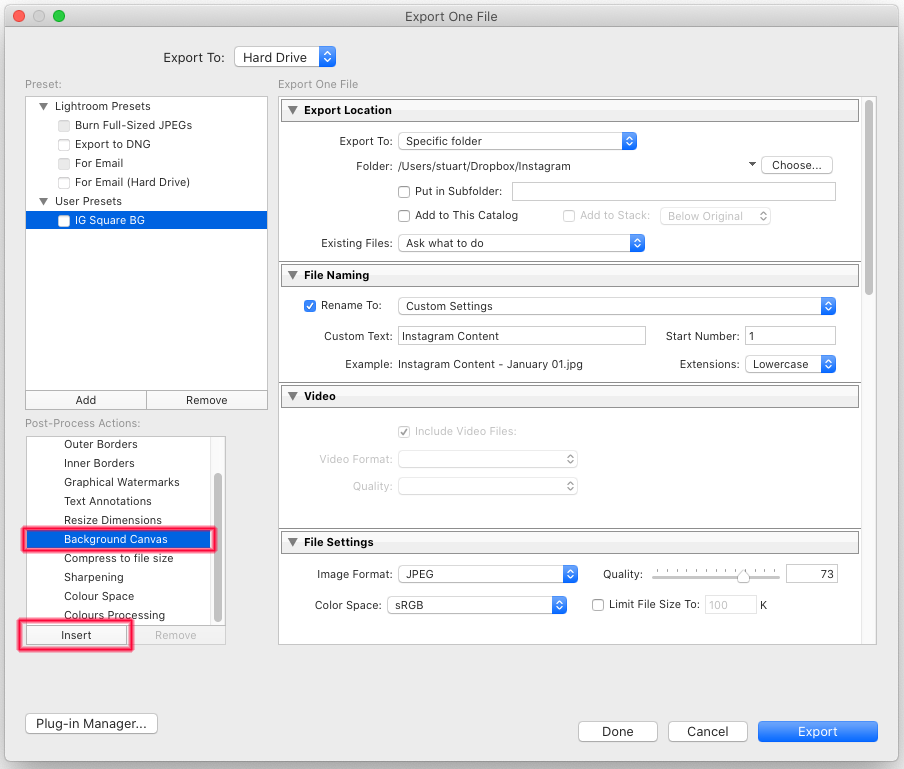
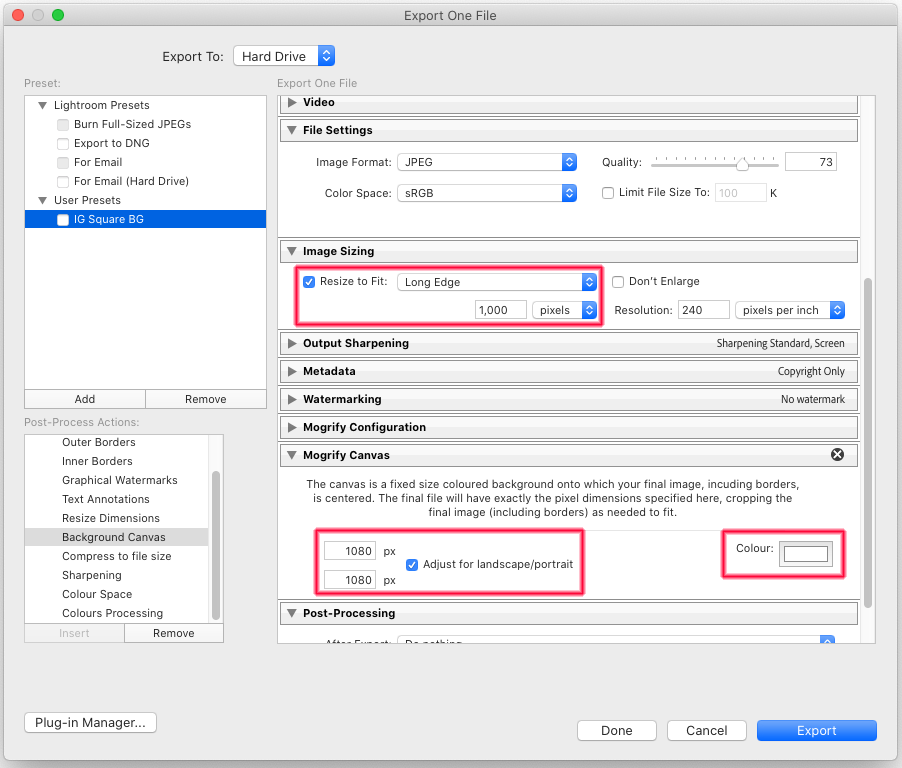
I’m aiming for an exported image size of 1080 x 1080 pixels, so I’ve set the Background Canvas options to that size. You’ll also need to change the background colour to white, as this defaults to black.
To give a small border around the largest dimension of the image, I’ve set the Image Sizing options to resize the image to 1000 pixels along its longest edge. This will give me a 40 pixel border. You can adjust these values to suit.
Saving the Preset
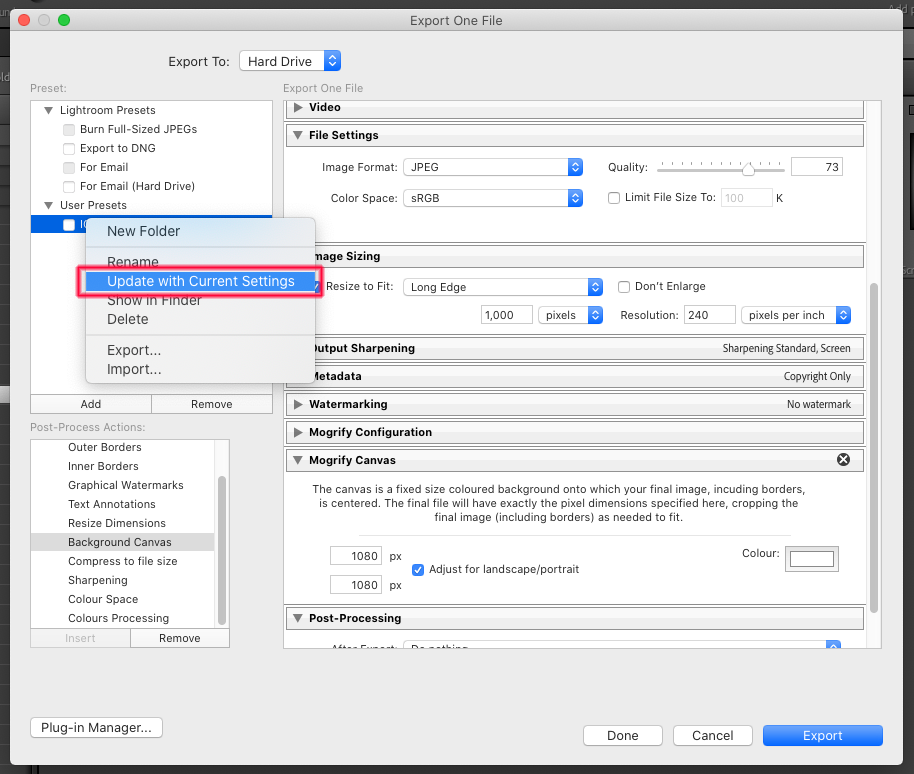
Once you’ve set the parameters for the preset, it’s important to save it, otherwise the changes won’t stick. Right-Click on the preset name, and select ‘Update with Current Settings’ in the popup menu. It’s not obvious that this needs to be done to save the preset settings!
Adding the White Border & Exporting
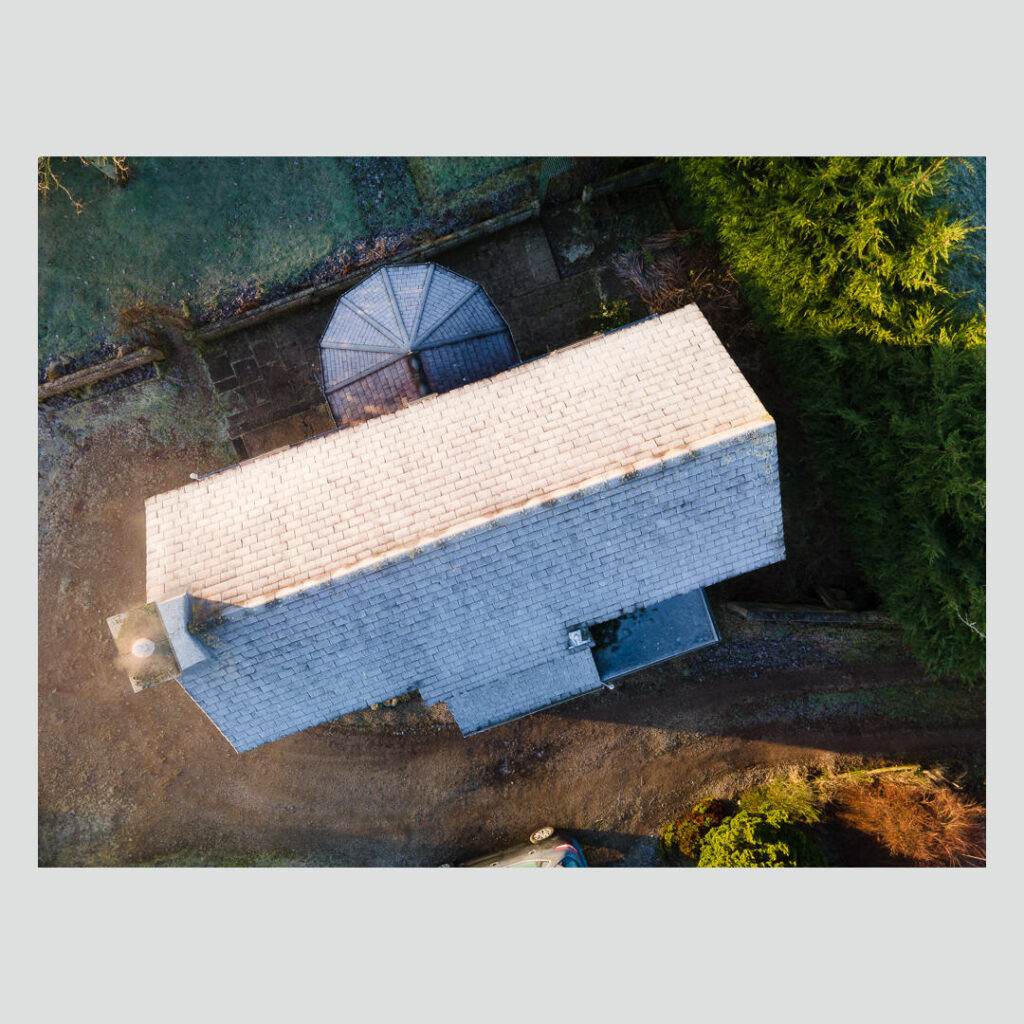
To export an image, simply select an image in Lightroom, and select Export with Preset from the File menu. Select your newly-created preset from the popup menu. Your image will then be exported ready for Instagram with a square, background. The background in the image below is actually grey, as you’ll see, so that it shows up against the white background of this blog page.
Hopefully, you’ll find this article useful. If you’ve got any questions or comments, pop them in the comments below.
This article is based on Lightroom Classic V11.1 and LR/Mogrify 2 V5.10