Great GoPro Nightlapse using the Hero 9 Black
I’ve always been fascinated by timelapse videos, particularly those of the night sky (nightlapse). Where I live, I’m lucky to have a good view of the North sky and very little light pollution – in other words, the ideal location GoPro NightLapse videos!
I’ve got a GoPro Hero 9 Black that I bought to use when cycling. I did some experiments with timelapse at the start of last year, capturing some snow showers from my office window. During this, I learned that the GoPro battery will last for about 4/5 hours in timelapse (it generally lasts just over an hour in normal use on my bike).
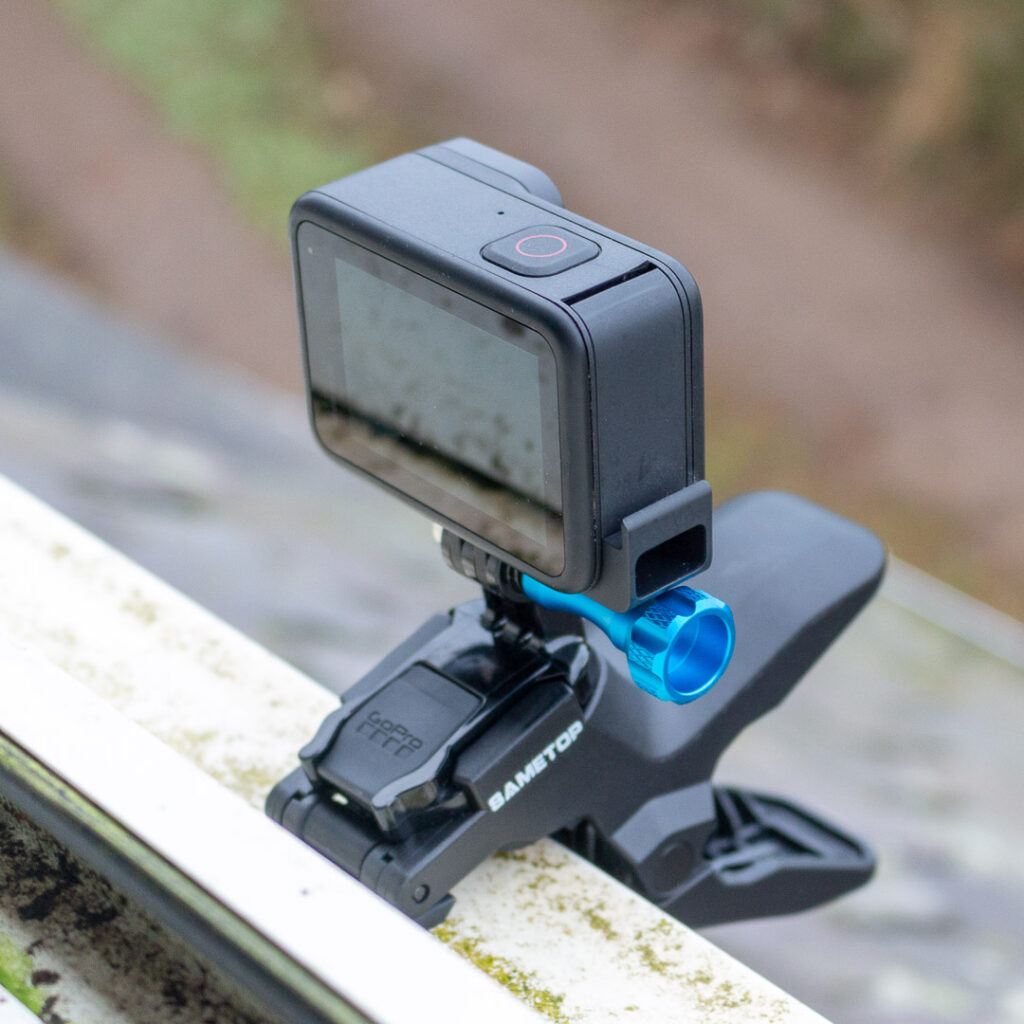
My first GoPro nightlapse experiments were initially conducted with the GoPro mounted on a clamp outside my bathroom window, which has a nice North view over the surrounding fields. I started on mid-summer’s night, using a slightly longer interval between frames, but again the battery ran out after about 5 hours. Obviously, I needed to rethink my strategy and look at using an external battery.
My GoPro Nightlapse Setup
External Power
The first problem I had to solve was powering the camera for the entire night. Last year, GoPro introduced a Pass-Through battery door that allowed a USB-C cable to be connected to the charging port, while still maintaining a degree of weatherproofing. This looked ideal for my purposes. There were already a few third-party replacement doors that allow access to the charging port, but none of the ones I’ve seen offer any protection against the weather. Given that I live in the North-East of Scotland, and our weather can be changeable, to say the least, I thought the GoPro one would be a good investment. Obviously, none, including GoPro’s own model, are going to maintain the waterproofing of the GoPro with the original door.

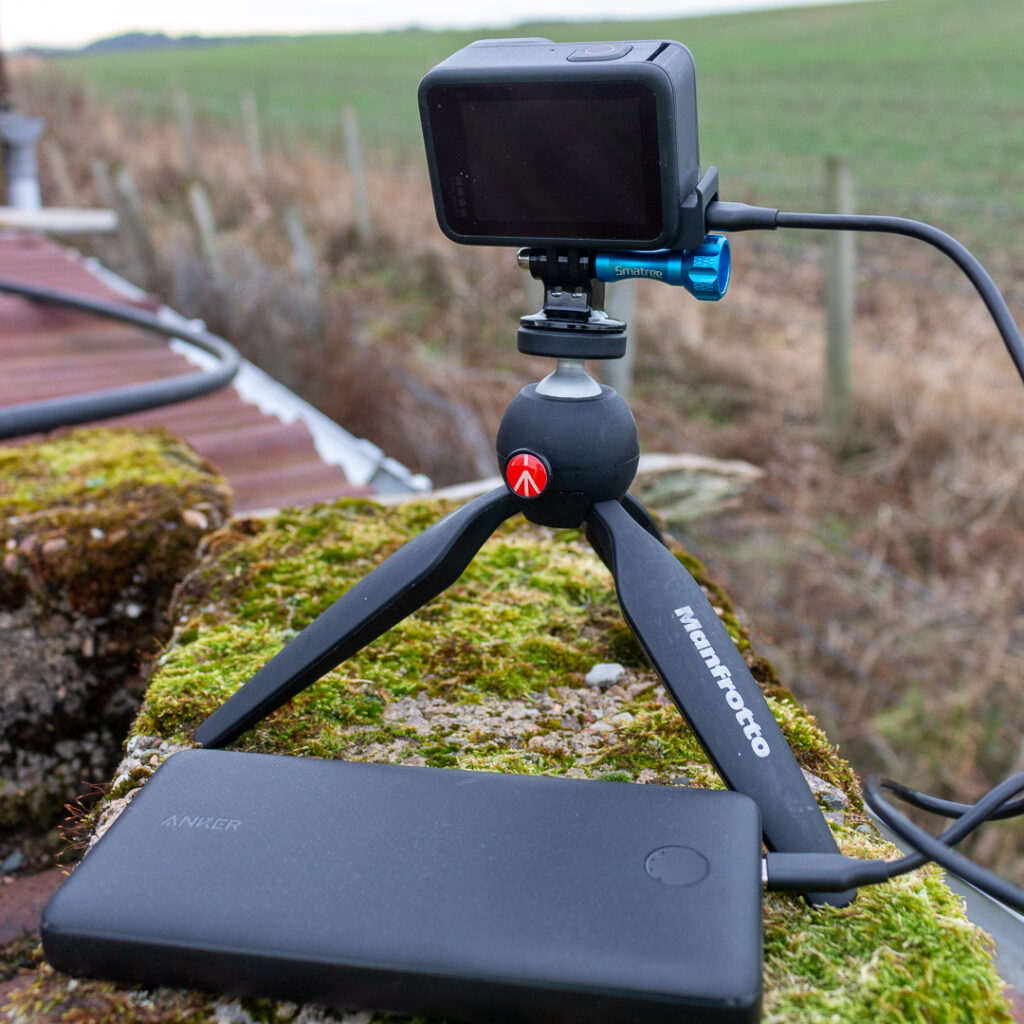
I also bought a 20,000 mAh Anker PowerCore Essential 20000 Powerpack to keep the GoPro going during the night. This works really well, with an overnight timelapse barely making a dent in the powerpack’s capacity. To protect against the weather, I wrap the powerpack in a plastic food bag, as the USB ports are exposed.
Tripod
The camera needs to be on a sturdy tripod. Much of the time, I have the camera on the roof of an outbuilding, so I only need a small tripod. GoPro have their own models, but I found them a bit on the flimsy side. I use my Manfrotto PiXI mini tripod, with a universal tripod adaptor to fit the GoPro camera. I also use the GoPro on my old, full-sized, Velbon tripod, where I don’t have the luxury of a convenient roof!
Shortly after GoPro released the Hero 10 model in 2021, they released a new Enduro battery, that gives longer battery life and better performance in cold weather This may be a benefit for timelapse, but I haven’t had a chance to get hold of one and try it yet.
Products & Links
- GoPro Hero 9 Camera – gopro.com
- USB Pass-Through Door – gopro.com
- Anker Powercore Essential 20000 Powerpack – anker.com
- Manfrotto PiXI Mini Tripod – manfrotto.com
Camera Settings
I started using the built-in GoPro Timelapse setting, taking one frame every second. This translates to about 2 seconds of footage for every minute. When I moved to the GoPro Nightlapse setting, I tried 30 seconds between frames, which gave a more speeded-up effect, but just seems a bit TOO much. I eventually settled in 15 seconds between frames, and I’ve stuck with this for my Nightlapse videos. This gives me about 2 minutes of video for the entire night, sunset to sunrise.
I have the resolution set to 4K, as this gives me some scope for cropping the video afterwards. I’ve also experimented with adjusting the exposure and have settled on +1 EV for shooting from late Autumn to Spring when the sky is really dark – where I live it never really gets that dark in the summer.
I usually have the lens setting as ‘Linear’. I’ve tried using ‘Wide’ to get the maximum view of the sky, but it’s just a bit TOO much of a wide-angle. I’m planning on experimenting with the ‘Narrow’ lens setting when I’m specifically targeting Aurora Borealis as this tends to be over a narrower part of the sky.
I use H.264, as I’m editing on an older Mac and H.265 is too much for it. For an overnight timelapse, the file size is in the 1.5-2 GB range. Another thing you’ll need is plenty of disk space!
Positioning
I started off with the camera facing North, in an attempt to catch the Aurora Borealis, but as you’ll see from the videos in my gallery, I’ve tried various locations around here, pointing the camera in various directions. Where I’ve tried to capture the predominately the sky, I’ve got the camera angled up at about 20 – 30 degrees.
Editing GoPro Nightlapse Videos
Most of the time, you’ll want to edit your NightLapse video to show the highlights and remove the boring bits. I use a combination of iMovie and Final Cut Pro. For 90% of my editing, Apple’s free iMovie is fine. I’m in the process of putting together a couple of posts on basic editing in iMovie, focused on GoPro movies. I’ll have this on this site soon.
I’ve also written a brief post on extracting still images from the video footage.
Results
It’s all a bit hit-or-miss on what you’ll capture. Clear skies at the start of the night doesn’t mean it’ll be clear all night. I’ve had lovely sunsets, only have the clouds come in or fog descent. It’s also worth thinking about the phase and position of the moon as well, as this can wash out the stars and any Aurora.
I’ve had good results where I’ve just taken a chance putting the camera out, and have got beautiful sunrises. I’ve also captured space debris returning to earth, and the invasion of the Martians (not really – it was just the farmer baling his field!)
Over on my gallery page, there are more time- and night-lapse videos.