iMovie and GoPro Quickstart – Part 4 Transitions, Titles & Audio
Transitions
When you add clips to your timeline, iMovie adds a basic crossfade between each clip. This works quite well, but you’ll probably want to add some different transitions between your clips.
There are a good number of transition effects built into iMovie, so you should be able to find one that suits the style of your movie.
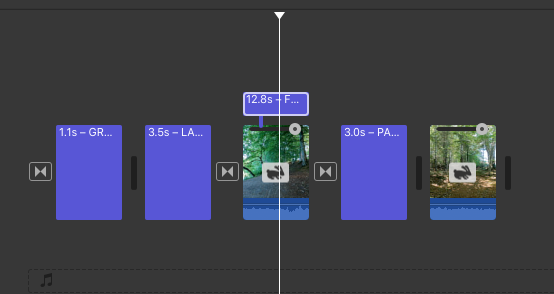
To add a transition, select the Transitions tab above your media and you’ll see the available styles displayed. Select the one you want to add, and drag it to place it between the clips in your project.
By default, a transition is 1 second long. You can lengthen or shorten that by double-clicking on the transition and typing a new duration in the popup dialog. If your movie has more than one transition in it, you can apply the new duration to all the transitions. It’s worth remembering that the transition does eat into the end and start of each clip, depending on the duration of the transition.
Titles
Once you’ve made some progress with your movies, you might want to add opening titles to your movie and maybe some closing credits. There are a number of different styles of titles built into iMovie, from basic text to a Star Wars-type crawl. It’s straightforward to add these to your movie.
The selection of title styles available is in the Titles tab above your media. Most of the titles have an animation, and you can see this by skimming your cursor over the title. You’ll see the animation effect and how the title transforms into the start of your clip in the playback window.
To add a title block, select the style of title you want, and drag it onto your timeline, dropping it at the start of the timeline, between two clips or at the end of your timeline. To edit the text of the title block, click on the text, and you’ll be able to edit it in the playback window.
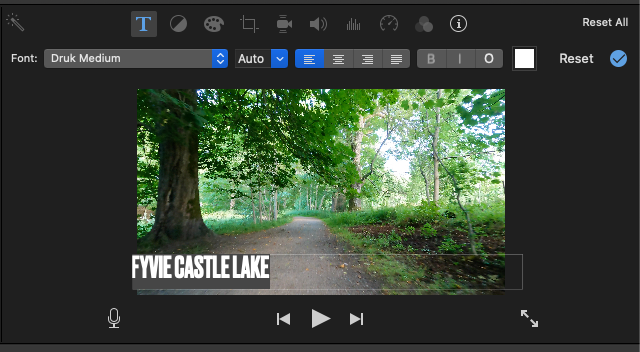
Above the playback window, you’ll see controls to set the font, size & colour of the text. There’s also a Reset button at the end to set everything back to the default setting if you make a mess of things (as I often do)!
To add text that overlays the video clip, simply drop the title ABOVE the clip. Again you’ll be able to edit the text in the Playback window, and the duration of the text can be stretched by dragging, using the mouse.
If you want to add a static title block, with a logo perhaps, you can create an image in Photoshop or similar and add it to your movie as a photo. You can choose the duration that the image is shown for and add a transition between it and the start of your movie to create an opening title.
Audio & Sound Effects
Depending on your subject, you might want to add an audio track to your movie. There’s also a number of short sound effects than come built-into iMovie that you can add to your work.
Sound Effects
Let’s start with built-in sound effect clips first. In the Audio & Video tab, above the Media window, you’ll see a range of short sound effects that you add to your movie. To add one of these, simply drag it from the window and drop it onto your timeline where you want the effect to start. You’ll see the clip appear below your video clips. As with the video clips, you can make adjustments to the audio clip by selecting it, and using the controls in the toolbar above the playback window. Of course, only the controls relevant to audio are enabled.
Audio Tracks
To add a longer audio file, for instance, a backing track, you’ll need to import the track into your ‘My Media’ tab. You can do this by either drag-and-dropping the file or by using the Import button. Either way, the file will appear alongside your clips. Instead of showing a frame, like the video clips, the audio clip will show the waveform of the sounds.
Again, to add the audio track to your movie, drag it to your timeline. You’ll see it appear underneath the video clips. You can use the controls above the playback window to adjust the volume, add audio filters, etc.
You can, of course, add music from iTunes, although you may face problems if you use copyrighted music in a movie that you upload to a service such as YouTube.
These four posts (Part 1, Part 2, Part 3) should cover most of the things that you’ll do in iMovie. In the next post, I’ll cover the differences between the desktop and iPhone/iPad versions.