iMovie and GoPro Quickstart – Part 3 Clip Appearance
In this post, I discuss how to alter the appearance of each of the clips that make up your movie.
When you select a clip, you’ll see a toolbar with a number of controls above the playback panel. These allow you to alter or apply effects to your clip. Note that the effect or edit is applied to the entire clip. If you want to edit a portion of your clip, you’ll need to split it into two, as described later in this post.
Automatically Improve Clip
The first button about the playback window looks a bit like a magic wand. This is the Automatically Improve Clip button, that will use iMovie’s built-in filters and tools to apply the best settings to your clip.
Of course, this may not be to your liking, and you may want to make individual adjustments, as described below! There’s also a Reset All button at the end of the toolbar to undo any changes.
Colour Balance
Colour Balance lets you match the colour of different clips, that may have been taken on different days, with different weather conditions, or with different settings on your GoPro.

Auto
This option uses iMovie’s built-in settings to make what it thinks is the optimum colour balance adjustments to your clip
Match Colour
The match colour options lets you select two different frames from different parts of your clip and match the colour balance.

White Balance & Skin Tone Balance
The White Balance & Skin Tone Balance options both work in a similar way. Here, you’ll see the cursor change to an eye dropper, and you can select a part of the clip that’s white or has skin tone, depending on the option. The colour balance of your entire clip will be adjusted to match the area you’ve selected.
Reset
You’ll be glad to see there’s a Reset option of all the colour balance controls, so you can always Gert back to where you started, if you’ve not happy with your adjustments.
Colour Correction
Colour Correction working in a similar way to the colour controls in applications such as Photos and Lightroom. The first slider lets you adjusts shadows, mid-tones and highlights to suit the type of footage you’re editing. The middle slider adjusts the colour saturation, making the clip more or less colourful. The final slider adjusts colour temperature, making to clip look warmer or colder by adjusting the reds and blues.

Cropping & Rotation
When iMovie encounters clips that aren’t in 16:9 ratio, it automatically crops them to fit, adding black bars above and below the clip. To change this, use the Crop Option in the toolbar. The first option uses iMovie’s default setting to crop your clip, while the section option allows you to adjust the crop of the clip to suit. You can also rotate the clips through 90 degrees using the two buttons to the right of the toolbar.

Ken Burns
The Ken Burns effect is a way of showing photographs or still images in a video when the full image is slowly revealed by panning and zooming out. The effect has been used extensively by documentary maker Ken Burns, hence the name.
Stabilisation
The Stabilisation setting allows you to remove camera shake from your footage. If you’re using GoPro’s built-in Hypersmooth option, you shouldn’t need to use this. However, it’s useful if you’re combining your GoPro footage with footage from elsewhere, such as a DSLR or Mirrorless camera or if you didn’t have Hypersmooth on. When it’s in use, however, you will lose a small border from around your clip, as iMovie stabilises the video. The clip will, however, be scaled up by iMovie to match the clips.

There’s also the option to fix any Rolling Shutter effects. This generally occurs because the image is read from the camera’s sensor line-by-line and the subject may have moved between reading the first row of the image and the last row. I haven’t seen this happen with any of my GoPro footage, purely due to my subject matter, but the option is there to fix it if it does, or if you need it for footage from other sources.
Volume
This option is fairly simple and it lets your adjust the volume of your clip, and also remove the audio entirely.

Noise Reduction & Equalisation
This option’s fairly simple as well, in that it can reduce the background noise in a clip. You can also apply different equalisation filters to the audio, such as enhancing voice, hum reduction or bass or treble boost & reduction.

Speeding up and Slowing down Clips
Sometimes, it’s useful to change the speed of a clip for a slow-motion effect, or to give an impression of speed. Unlike the other effects in this section, you can only change the speed of a clip once it’s been added to your timeline. Once you’ve selected your clip and the Speed button, you’ll see options to select a pre-defined speed, or to set a custom one. You can also reverse the clips, and there’s an option to NOT speed up the sound (Preserve Pitch).
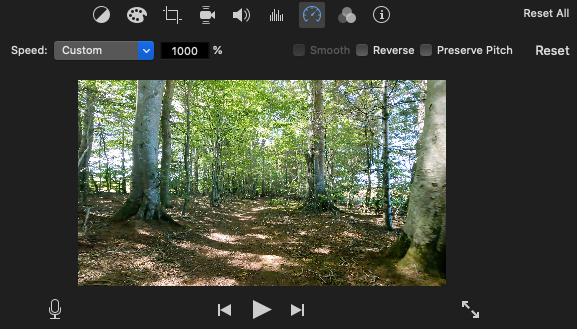
If you speed up a clip, you’ll see an icon of a hare appear over the clip in your timeline. Likewise, if you slow down a clip, you’ll see an icon of a tortoise.

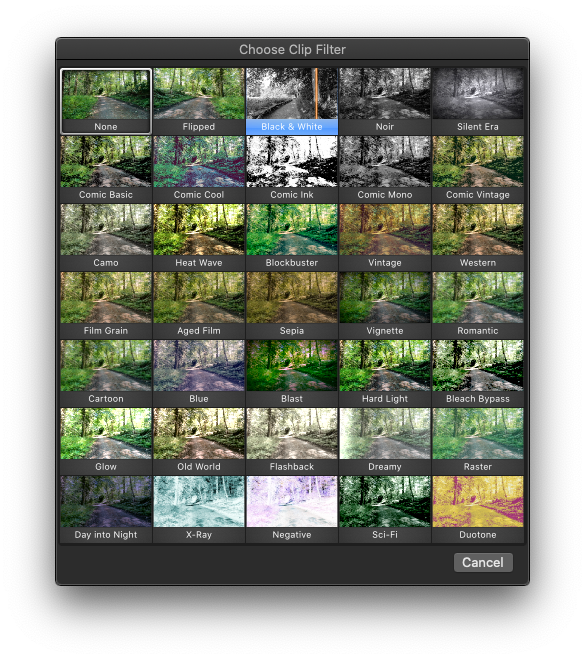
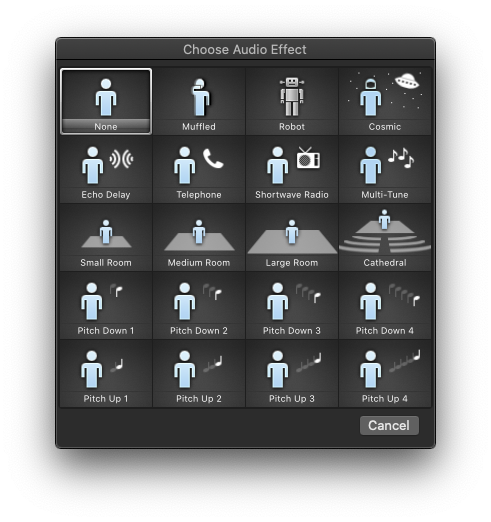
Audio and Clip Effects
This option lets you can apply various built-in video effect, such as vintage film or black & white, and audio filters to your clip. For the video filters, there’s also an option of how much of the filter to apply. As with many of these options, there’s a Reset to remove all your changes, if they’re not to your liking!

Info
The last button in the toolbar displays information about the current clip, including the date and time the clip was recorded and its duration.
Coming Up
In the next post in this series, I’ll explore adding Transitions, Titles and adding audio tracks to your project.