Slicing Panoramic Images in Photoshop for Instagram
Introduction
In the early days of Instagram, images were limited to square images. Things have moved on now, and a range of rectangular formats are supported. However, if you want to post a panoramic image, you’re still limited to 16:9 ratio and you’ll end up with a narrow image in the middle of the frame and big borders top and bottom. For best effect, you can slice the image into individual square images, and upload these to a post as multiple images in a carousel. Your followers will then be able to swipe across your panorama.
You can also use a 3 x 1 sliced image as pinned posts at the top of your profile.
This post describes how to slice up a panoramic shot in Adobe Photoshop for posting on Instagram or similar.
Open Image in PhotoShop
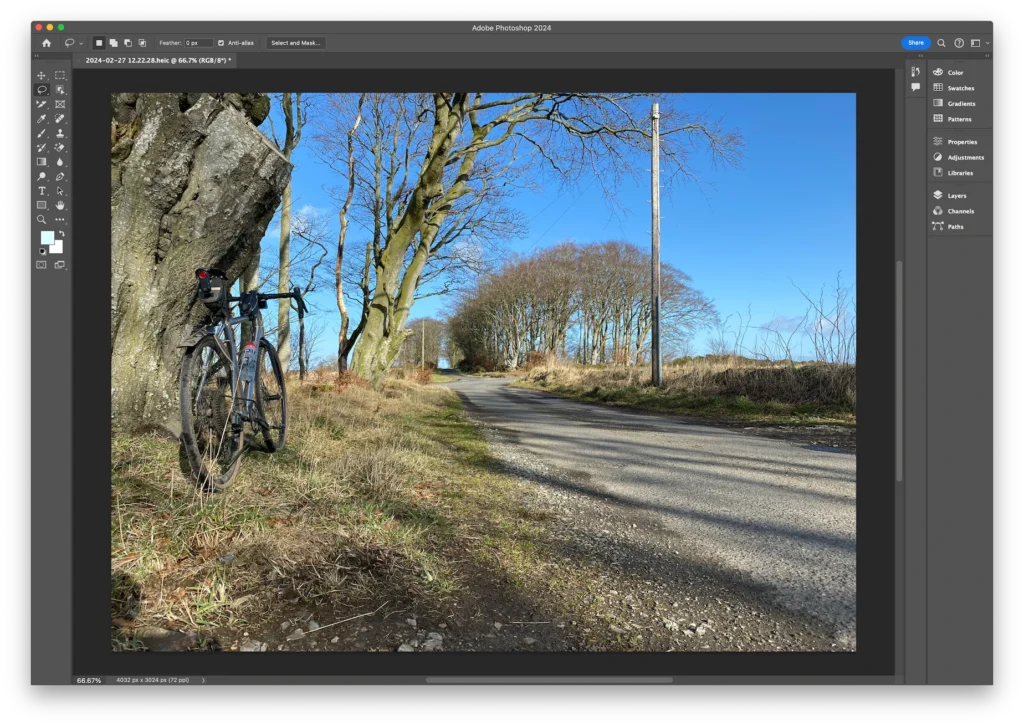
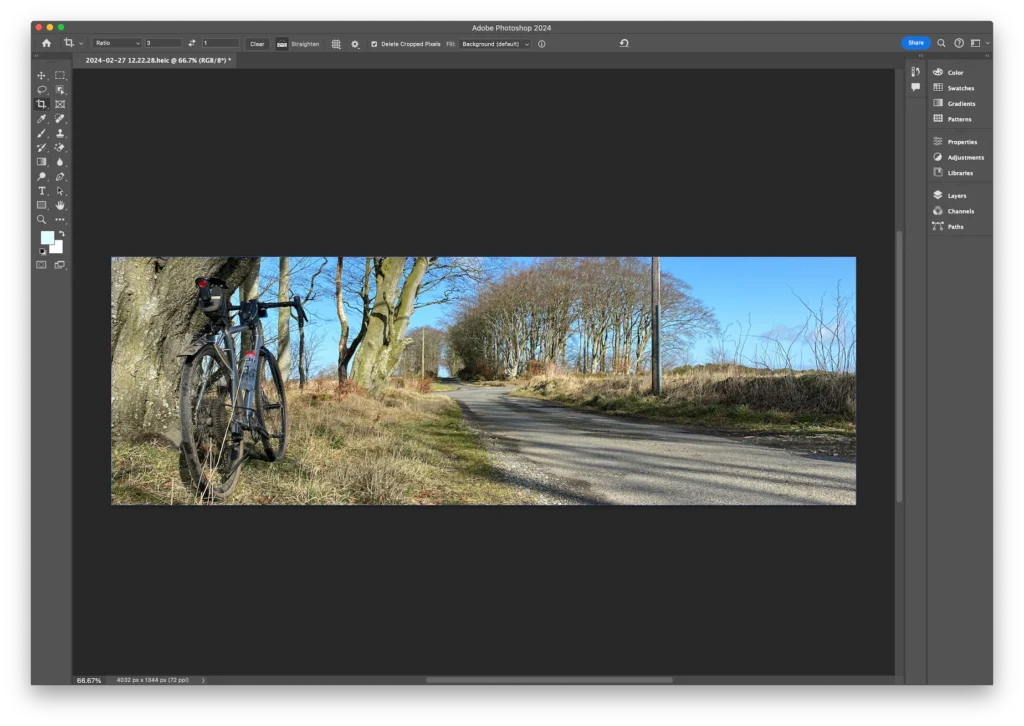
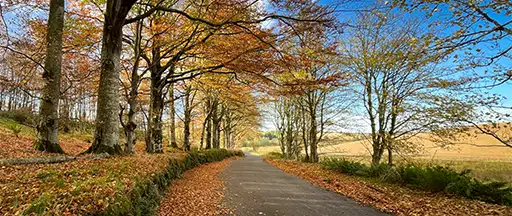
Open the image you’re using as a panorama in Photoshop. You can use either existing panoramic image, or, as I’m doing, take a slice out of a normally proportioned image. This image was taken on my iPhone 11.
Crop image to exact proportions
The first step is to crop the image so that it’ll able to be sliced into an exact number of squares for Instagram. Depending on the size of your images, it’ll be 1:2, 1:3, 1:4, etc.
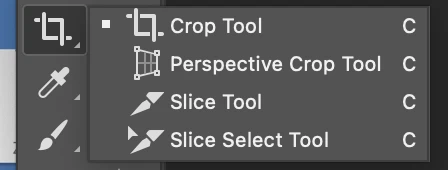
Select the Crop tool from the tool palette.

In the toolbar at the top of the screen, set the ratio you want for your image. For instance, if you want it split into 3 slices, set the ratio as 3 by 1.

You’ll see the crop rectangle appear on your image. The crop will be set to the full width of your image. To resize the crop, drag the handles at the corners. To move the image, click and hold on the image, then drag to move it within the frame.
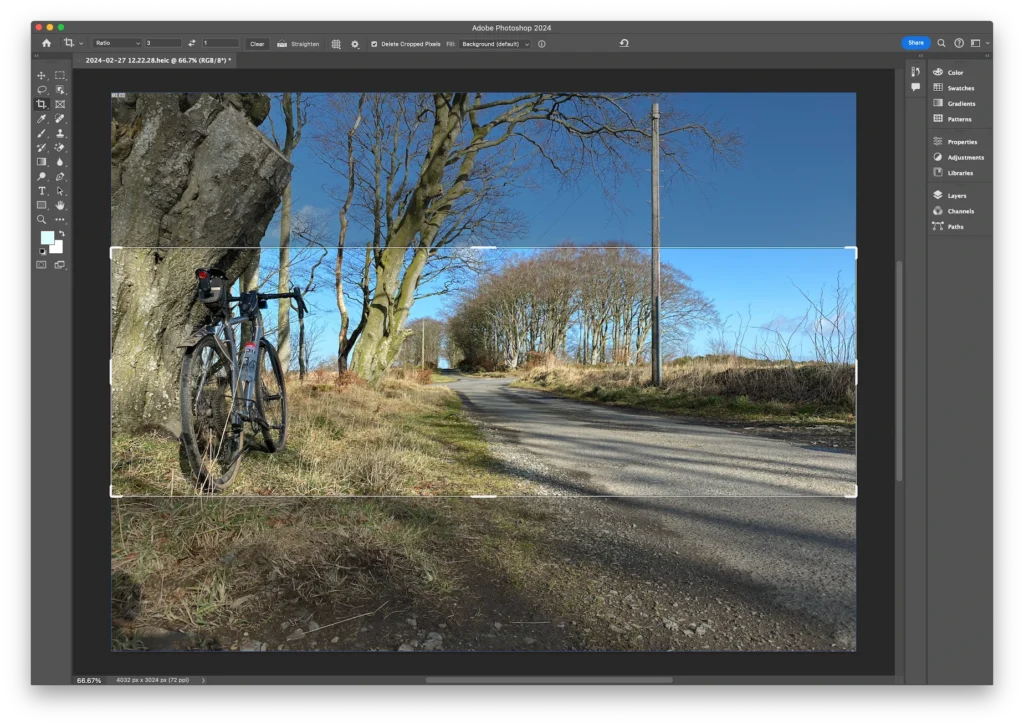
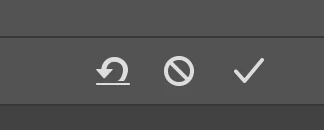
Once you’re happy with the crop, click on the tick button to accept the settings.
Slice the image
Select the Slice tool from the tool palette. This is in the same set as the Crop tool, so click and hold on the Crop tool to show all the tools, and select the Slice tool.
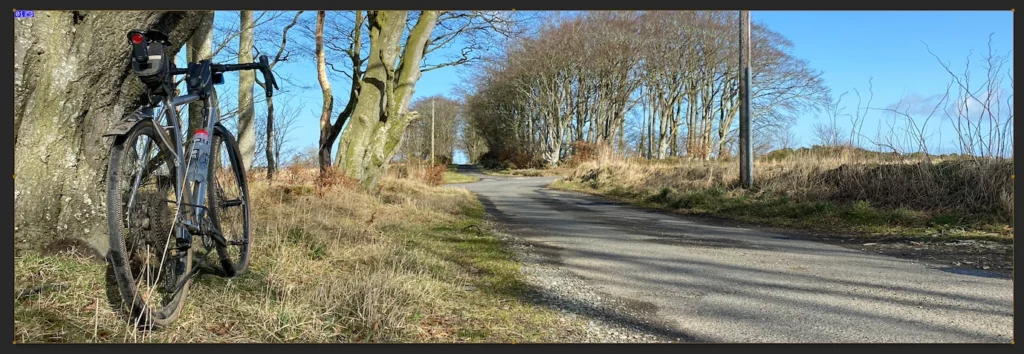
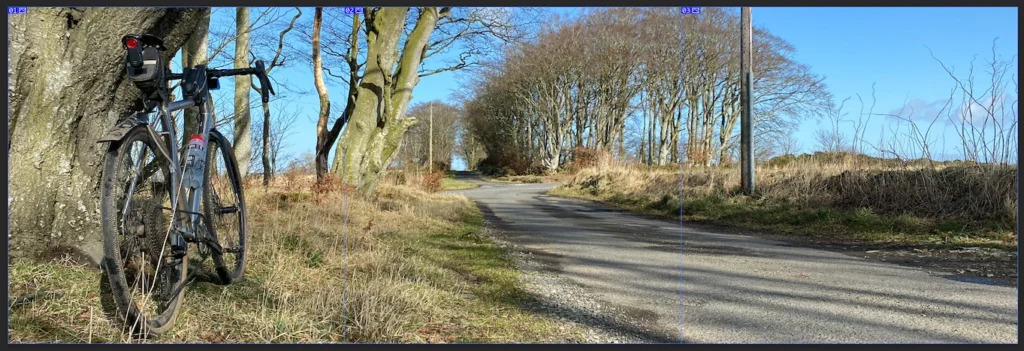
Once the tool is selected, drag around the outside of the image to select the entire image.
In the top left corner of the image, you’ll see two tiny icons.
Right-click on these, and select Divide Slice from the popup menu.
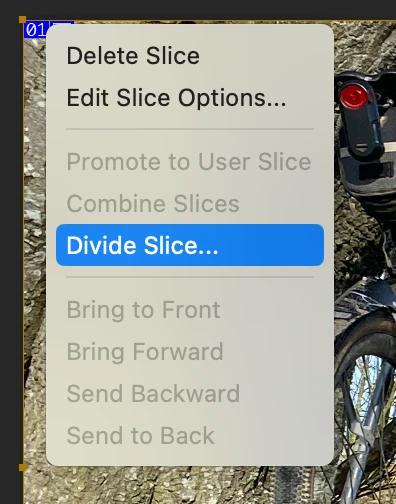
In the subsequent dialog box, select how you’ve like your image sliced. In my case, I was in divided vertically, into 3 even slices..
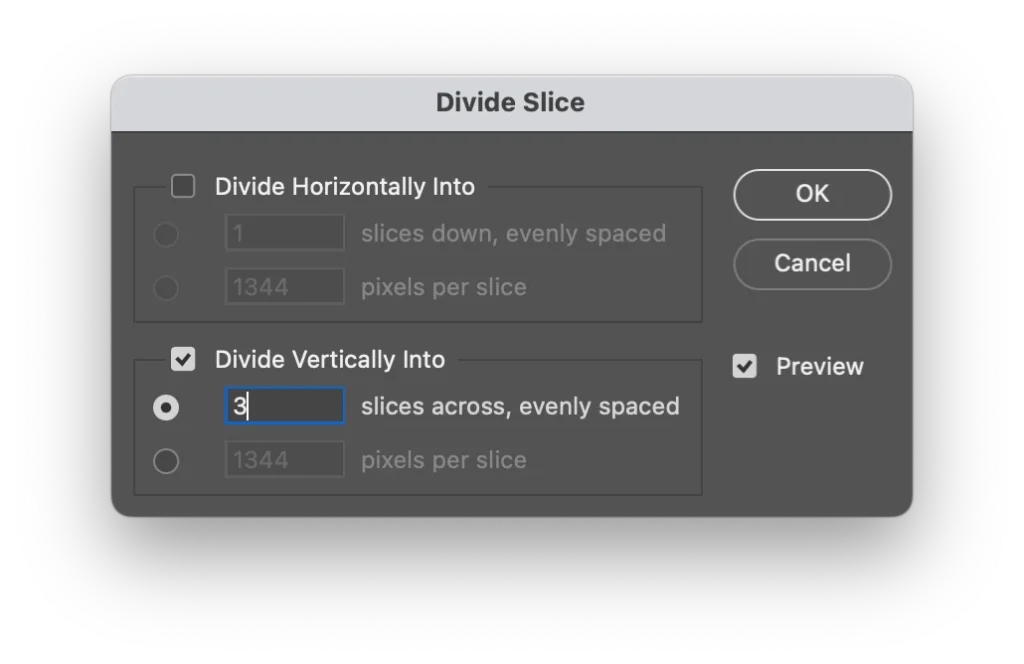
As you enter your selection, you’ll see a preview of the slices overlaid on your image as thin blue lines. click OK.
Exporting the Sliced Image
To save your sliced-up image, select Export from the File menu, then select Export for Web (Legacy) from the popup menu. You’ll see a dialog box displayed showing a part or all of your image.
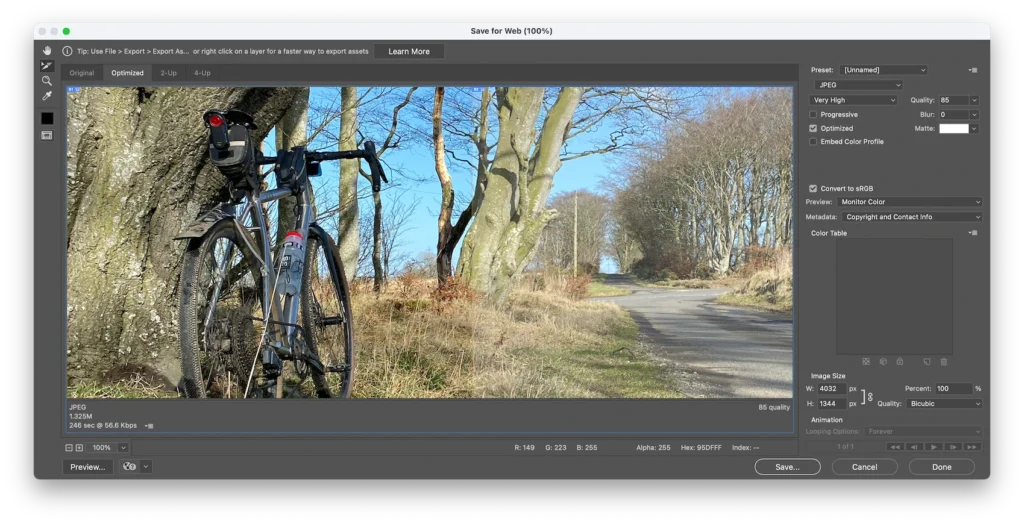
Before you export the slices of your image, you need to set the file format and compression for each slice. It’s important to remember that you need to do this for each slice, and not just the first one, otherwise only the first slice will be in the specified format, and the othered will be in Photoshop’s default one (usually GIF). I’ve been caught out by this many times!
If all the slices of your image aren’t visible in the preview, click on the zoom buttons in the bottom left to zoom out until the entire image is visible. With the Slick tool selected, click on the first slice and select the other slices by shift-clicking on them. You’ll see a visual clue as the slices are selected.
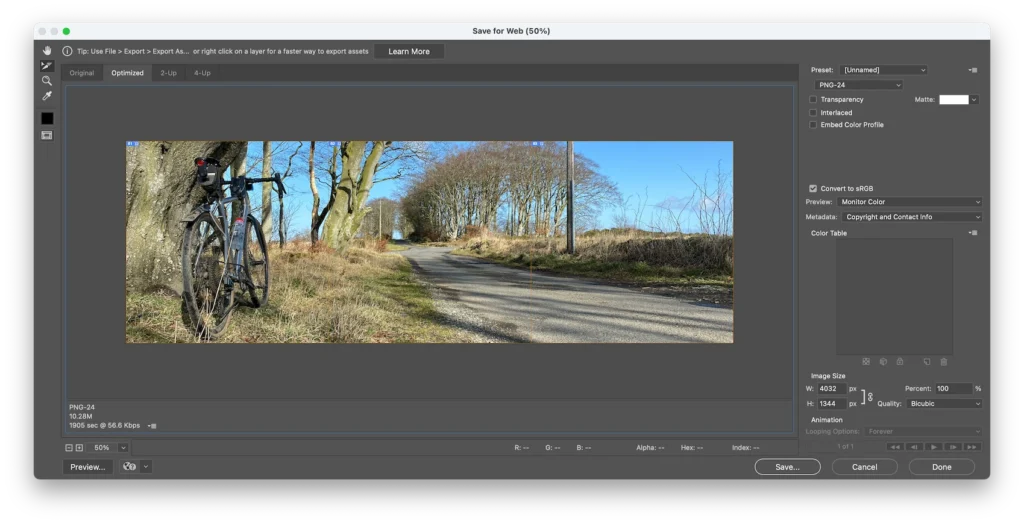
Set the format for the slices using the settings in the top right of the dialog. You’ll probably want to export in PNG-24 or JPG with a quality of 80-85. Remember that Instagram will apply additional compression to the images, so it’s probably best to start with PNG.
In the bottom left area, set the height of the exported slices. For Instagram, set this to 1080 pixels.
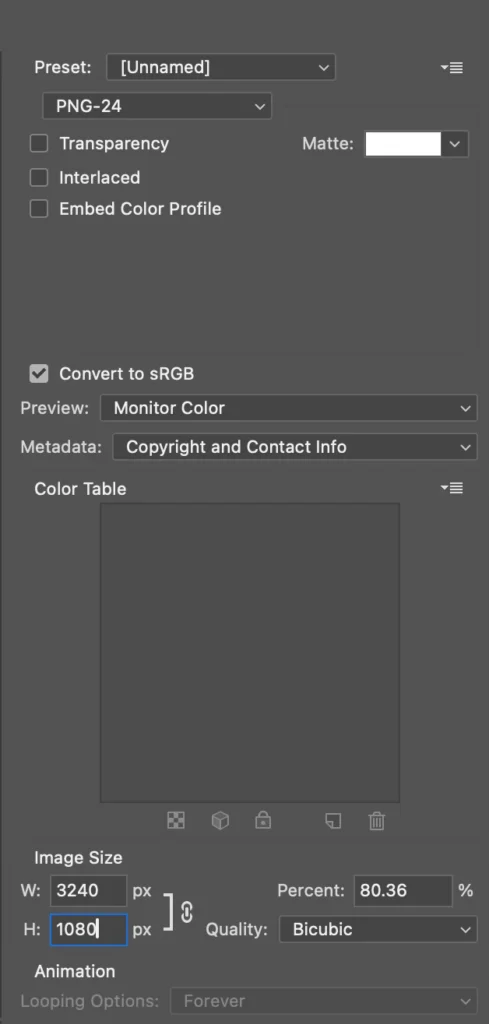
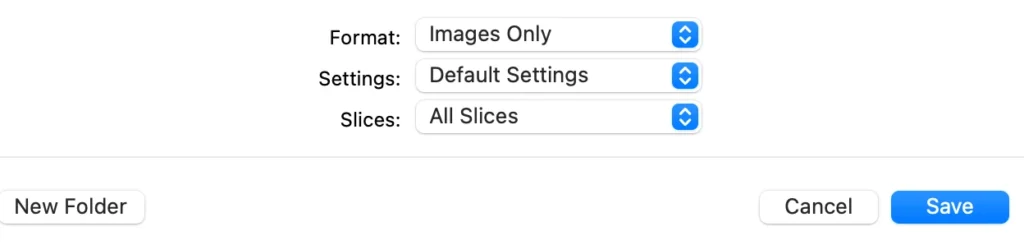
Next, click Save. In the next dialog box, make sure that the option at the bottom of the dialog is set to All Slices. Click save (again!) and the slices will saved into the folder called Images in the selected location.
I think there must be a more modern way to save the slices than using the Export for Web dialog. I’ve been using that since the early days of the web and Photoshop, and I’d have expected Adobe to have integrated that functionality into one of the other export options. However, I can’t find it! If you know, leave a comment, and I’ll update this post.
Uploading to Instagram
To create a carousel-type post, upload all the images to Instagram. Before the post is shared, you’ll be able to move the images into the correct order.
Pinning to Top of Profile
To pin the images to the top of your Instagram profile, upload each of the images as a separate post. Once the posts are in your profile, select the post you want to be right-most, and click on the dots above the image. Select Pin Image. Next, select the post you want to be in the middle and repeat, finishing up with the left-most image. As far as I can see, there’s no way to arrange the order of the images, other than by the order that they are pinned in.


Thanks this was helpful and easy to follow