iMovie and GoPro Quickstart – Part 1, Importing your Footage
Once you’ve got some footage on your GoPro, you’re going to want to share it with the wider world. I use iMovie with my GoPro for editing most of my video footage that you’ll see on this site.
This article and the subsequent ones explain how to do some basic editing using Apple’s free iMovie app. It isn’t intended to be a comprehensive guide to iMovie, just enough to let you put together your first movie.
Although this post is written with a GoPro camera in mind, the principles apply to video editing from most sources, be it a DSLR/Mirrorless camera, a drone or a video camera.
The majority of this is Mac-based, but, since iMovie is also available on the iPad and iPhone, I’ll cover the differences when using these versions in a later post.
The screenshots here are taken from iMovie V10.2.5, so they might be slightly different if Apple has updated its software since this was written. For any major changes in iMovie functionality, I’ll update this post.
What is iMovie & How do I get it?
Apple’s iMovie is a free video editing app that’s available from the Mac App Store. It’s what’s known as a Non-Linear editor, as the original files remain untouched by the editing process. It’s the little brother of Apple’s Final Cut Pro (FCP) app, which is aimed at full-blown movie production. However, the user interface and workflow of iMovie is very similar to FCP and many of the basic techniques described here are also applicable to Final Cut Pro, should you move to that at a later stage.
If your Mac doesn’t already have iMovie installed, search in the App Store for iMovie.
Libraries, Projects & Events
At first, the way iMovie organises its files and media can seem a bit daunting, especially if you’re used to apps such as Word or Photoshop where you work on one file at a time. In iMovie, there’s Libraries, Projects & Events.
Library
A Library is the ‘Top Level’ container in iMovie. A library holds all of your movie clips from your camera, and lets you organise these into ‘Events’. A library called ‘iMovie Library’ is created in your ‘Movies’ folder the first time iMovie is opened.
You can create New libraries by going to Open Library in the File menu and selecting New…. You’ll get the option to decide where to create your new library and the name of the library.
When creating a new library, it’s worth remembering that it may take up a lot of space, as the video clips you’re using are copied into it, so you might want to place it on an external drive.
Event
An event is where your imported video clips, audio clip & photos are stored. The name of the event will reflect the timestamp of your clips. Of course, the name can be edited by clicking on it.
Project
The project is where you’ll put together your final movie, using the clips you’ve imported from your GoPro.
Getting Your Clips into iMovie
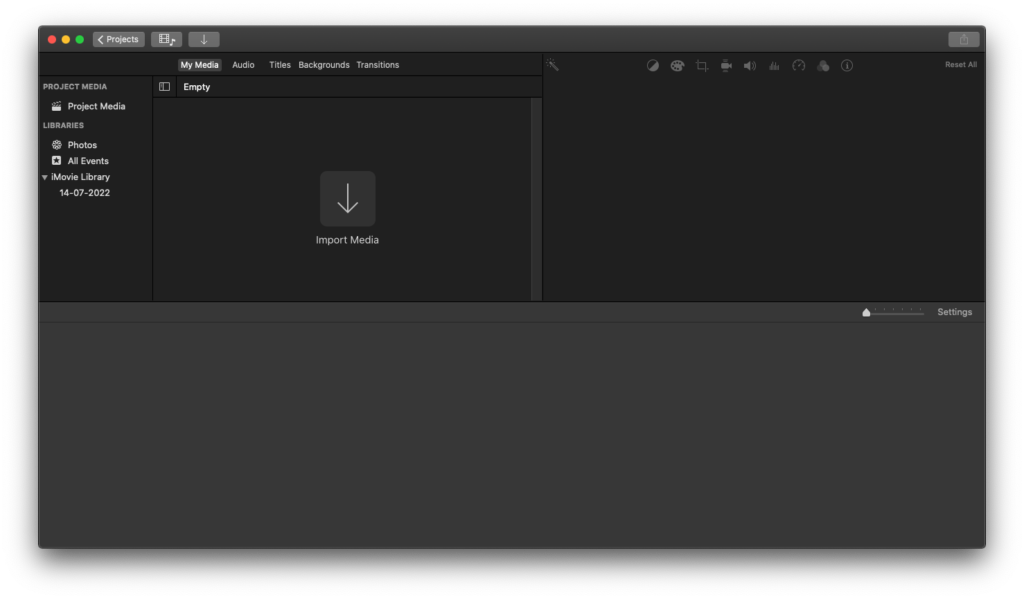
The first time you start iMovie, you’ll get an empty screen with a Create New button. Before you can create anything, you’ll need to get your video clips into iMovie.
There’s a couple of ways to get your video clips from your GoPro and into iMovie
Directly from the GoPro
If you connect your GoPro to your Mac, iMovie will pop up an import dialog box, where you’ll be able to select the clips you want to import. Once you’ve selected the clips you want, click the Import Selected button.
Your GoPro must be switched on, and set to connect in ‘MTP mode’, not ‘GoPro Connect’. This is set in the settings panel on your GoPro camera. I’m pretty sure this option applies to the Hero 8, 9 & 10 only. Models before this will just show up in iMovie.

Import Files
Alternatively, you can directly import the video files into iMovie from the GoPro’s SD Card. You can either drag-and-drop the files from a Finder window onto the iMovie Library in the left-hand panel, or use the Import dialog by clicking on the import button in the toolbar.
If you use the Import dialog, you’ll get the option, at the top of the dialog, to select the destination Event for the clips you’re importing.
It’s worth remembering that, regardless of how you import your clips, iMovie makes a copy of them in your iMovie Library. If you’re importing files already on your hard drive, you’ll use a lot of disk space.
Managing Your Clips
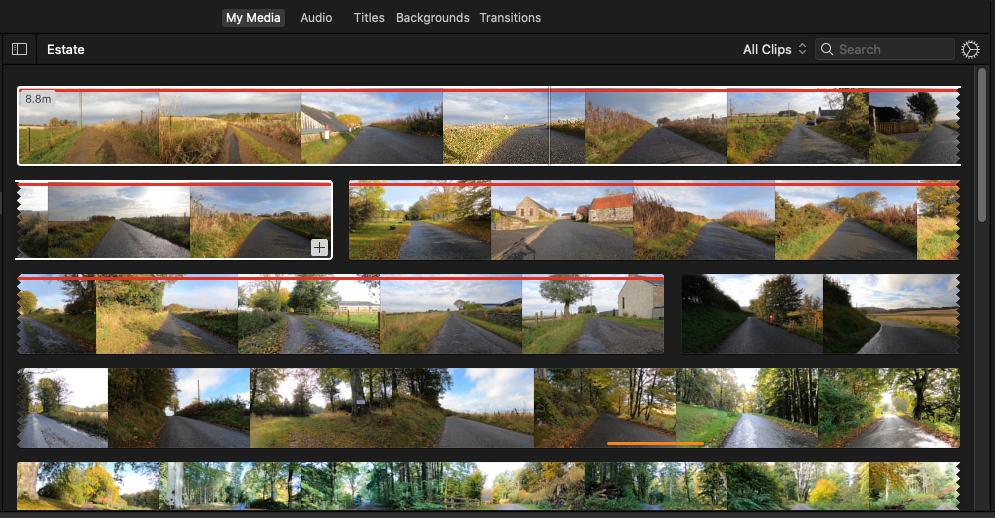
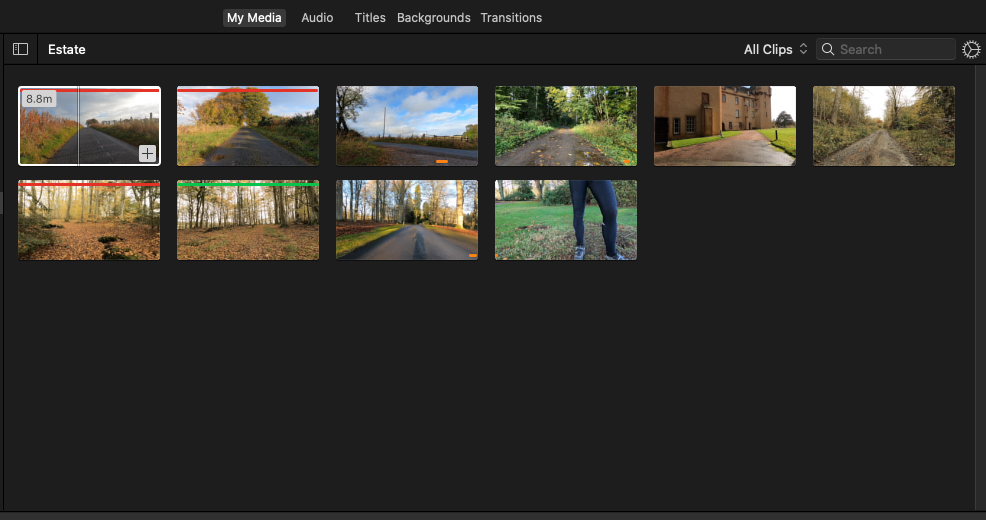
Once you’ve successfully imported your clips, you’ll find them in an Event in the left-hand panel, usually with the date of the clips as its name. Clicking on the Event will show the clips in the Media Panel.
Previewing a Clip
To play a clip in the playback window, click on it and press the spacebar to play from the current point. To play from the start, press the \ key.
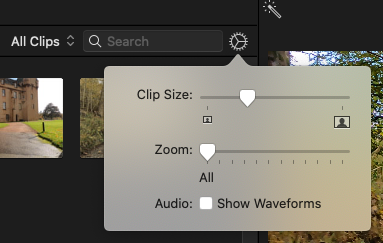
Clip Appearance
To change the size that clips appear in the Media Panel, click on the gear wheel icon to show the appearance settings. The Clip Size setting adjusts the size of the thumbnail, when the Zoom setting adjusts the length of each clip in the panel. Having a longer view on a clip makes it easier to find and set the in and out points for a selection.
Favouring & Rejecting Clips
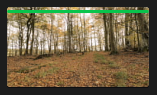
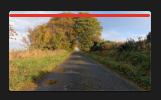
Each clip can be tagged as a Favourite or Reject” either by selecting from the Mark menu or by right-clicking on the clip. You’ll see a green bar along the top of the Favourited clips and a Red bar along the rejected ones. You can filter the visible clips using the popup menu at the top of the panel.
Putting it all Together
Once you’ve got your movie clips into iMovie, it’s time to start arranging them into a movie. We’ll explore that in my next post.
If you’ve got any comments or questions, please leave a comment below or get in touch via email.

Hi Stuart,
I know my process doesn’t work, but perhaps you can comment on how to improve it.
1) Our family shoots videos on their iphones, go pro, insta 360 devices, DLSRs, etc.
2) All the iphone photos go to a shared album (These are great for sharing, but not so much for downloading and importing to video editing software).
3) Since everyone is sharing an album, the gopro guys also download the videos from gopro to the gopro quick app and then to the iphone, then to the shared album (this is a process worth its own article). I suppose the DSLR and Insta360 folks also upload to the shared album.
4) Now everything is in the shared album, and I use imovie or filmora to do my editing. (I’m having issues with filmora now, so I’m using imovie)
5) Problem with video editing from a shared album is that the video software needs to download the movies from the shared album. It takes forever to edit videos this way.
6) I copy the content from the shared album to an album in Apple’s Photos software. This takes forever too.
7) After 3 weeks of copying, and downloading, I’m ready to start video editing. There has to be a better way.
Got any suggestions for improvement? Photos Library is where I store all my content. We capture family moments, children’s milestones, vacations, and trips. Turn them into youtube videos for our family to remember and enjoy for years.
Hi Ryan,
Thanks for taking the time to comment.
My workflow’s quite different to yours in that I’m the only person creating videos or image files.
For my GoPro footage, I usually copy the files off the camera (using the SD Card in a reader) onto my desktop Mac. From there, I make a backup copy onto my NAS (Network Attached Storage), just in case I really mess things up! After that, I import the files into iMovie (or occasionally, Final Cut Pro) and create my final edit from there. The final files end up on my blog or vimeo.
For my iPhone photos, I use Dropbox, and let it copy the photos and videos from my phone into it’s camera folder (the Dropbox app does this automatically when it detects an iPhone, camera or SD Card plugged in). From there, I import the photos into an Adobe Lightroom catalogue – currently I’ve got one catalogue for all my iPhone photos, but it’s starting to get a bit unwieldy, so I’m going to start using a separate catalogue for each year. Once the photos have been edited, they’re exported to instagram or for my blog.
My DSLR workflow is pretty similar to the iPhone one, except that I import directly into Lightroom. Again, I need to start using separate catalogues for each year.
I don’t really using Photo Library, as it seems very opaque and I don’t really understand what’s going on ‘under the cover’. I’m not really sure I can get access to all my original resolution images. I let my iPhone copy the photos into it, but that’s about it – I don’t put my DSLR photos or my videos into it.
Everything is also backed up to my NAS via ethernet, and backed up offsite using backblaze.
Maybe a solution for you would be to share the raw GoPro footage via something like Dropbox or iCloud, bypassing Photos Library, and then import the final, edited, footage into Photos Library?
Not sure if that’s any help to you, but feel free to ask if there’s anything else.