Migrating My WordPress Site to New Host
Recently, I migrated this blog to a new host – assuming you’re able to read this, it was successful!
My blog was hosted in a managed WordPress service, meaning that the hosting company took care of all the server-side updates and security issues. However this ALSO meant that I was restricted in what I could do with the server beyond WordPress. With this in mind, I decided to move to a VPS (Virtual Private Server), meaning that I had full control over the server and what it could do (within the bounds for the agreement with the provider, of course!). The downside of this is that I need to be on top of keeping the server updated and be aware of any security issues.
Here’s a few things I learned along the way during the moving process.
How
Once I’d found a new server provider for my VPS, it was time to setup the server. For those who don’t know, a VPS is a ‘bare-metal’ server that you need to install the entire server software onto.
Generally, during the initial VPS account setup, you’ll be asked to set a root password and decide what operating system (usually Linux) you want installed. In this case, I choose Ubuntu.
Initially, I decided to install the minimum required to run WordPress. This requires a web server, such as Apache, MySQL database server and php language. This is commonly known as a LAMP stack and there’s many, many pages about how to install this. The one I used is here: https://techvblogs.com/blog/how-to-install-wordpress-with-lamp-on-ubuntu-22-04
The post above also includes installing WordPress, which I did to test my server setup. My intention was to copy my existing WordPress installation over to this new server, but this confirmed my setup was correct.
Migrate
For migrating the actual site data to the new server, I looked at a number of different plugins, and eventually settled on Duplicator from the guys at snapcreek. The hosting for my old server didn’t expired for a month-or-so, so I had plenty of time to restart the process from scratch again if ti all went wrong.
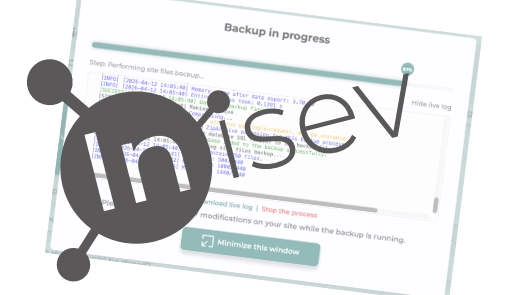
Duplicator makes a backup of the files and the database from your site. You upload these files to your new site, then run a php installer script. This replaces your existing data with that from your old site. At least, that’s the theory!
In my case, Duplicator couldn’t back up all the files from my site, as the process timed out before it had completed. This is probably due to the size of the data – it’s about 5 GB as there’s a lot of photos in the galleries. As my existing site was on a hosted service, I had no way to adjust the timeout to allow the process to run for longer – another reason to move to a self-managed setup.
All is not lost, though – the Duplicator guys provide a solution to this problem, where you can migrate your files yourself, and Duplicator will take care of migrating the database. You can either download the files from your old server, and upload them to the new one, or copy them directly onto the new server.
I choose to FTP the files directly from my old server. Then, I uploaded the files created by the Duplicator plugin and ran the installer in my browser, using the IP address of their new server. Once it had completed, I accessed the site using the IP and it looked good to go!
Move the Domain
The URL I was using from my blog is registered with Hover. When I moved to the hosted option last year, I left the registration with Hover and just changed the name servers to point to the hosting company’s name servers. This saved any issues with domains registered all over the place and forgetting what had to be renewed and where it was held.
To point the domain to the new server, I simply changed the name servers back to Hover’s one and updated the DNS to point to the new server.
It took a while to update, and, for a while, the domain pointed to some strange advertising sites. This seemed to be a side-effect of deregistering it with my old host, and the new DNS setting not having propagated correctly. After about 6 hours, it all seems to be working correctly and pointing to the new server.
After Domain had Migrated
Once I started to look around my relocated site, I noticed a couple of things weren’t quite working correctly. A quick Google discovered that I needed to enable rewrites in the Apache set-up: https://stackoverflow.com/questions/34670533/wordpress-rest-api-wp-api-404-error-cannot-access-the-wordpress-rest-api.
SSL
Now that my domain was pointing to the new server, it was time to setup the SSL certificate required for https. This is pretty straightforward, using Let’s Encrypt. Again, there’s many posts about this – here’s the one I used: https://www.digitalocean.com/community/tutorials/how-to-secure-apache-with-let-s-encrypt-on-ubuntu-20-04
Messed up!
At this point, it was getting late. The next day, when I looked at the site, it SEEMED to working, but there were some strange issues with internal links, where the link would point to the IP rather than the domain name. This meant that the site generated an insecure link warning.
I scratched my head over this for a while, then looked at the WordPress settings and discovered that the Site Name was set to the IP rather than the domain. Changing this, and the same setting in the wp-config.php file unfortunately had no effect.
At this point, I re-read the instructions for the Duplicator plugin and discovered that I’d missed a step! This involved modify the local computer’s Hosts file to point the domain to the new server’s IP. At some point in the Duplicator install process, it uses this information to make changes to the WordPress setup. In my case, the only information it had was the IP, so it had used that.
I decided the best action was to delete the existing WordPress database and redo the Duplicator install. I was fairly sure that it would work correctly, now that the old domain pointed to the new server. Anyway, I still had the old site, so I could just scrub everything on the new server and start again, if need be.
I’d already installed phpMyAdmin on the new server, so I used this to delete the existing WordPress database, and ran the Duplicator installer again. This time, it worked faultlessly, and the site seems to be working perfectly.
I’d thoroughly recommend the Duplicator plugin from snapcreek. I used the free version to do this migration, and it worked faultlessly (once I’d followed the ACTUAL instructions!). The plugin can also be used to back up your site to a number of services, such as dropbox and onedrive. There’s a number of paid plugins that will handle the migration for you, but unless you’re doing multiple migrations a year, they can work out quite expensive.