Maximise Your Ride: Introducing My Bicycle Gear Calculator
Finding the right gear combination for your bike can be a challenge, especially if you’re new to cycling. Fortunately, there are numerous tools available to help cyclists optimize their rides. One such tool is a bicycle gear calculator app, which can help cyclists determine the most efficient gear combinations based on their riding style, terrain, and physical abilities. In this blog post, we’ll take a closer look at how my bicycle gear calculator app works and the benefits it can offer to cyclists of all skill levels.
Update 23/10/24 – GearCalc has moved to its own domain: GearCalc.cc
GearCalc is here: https://stuarttevendale.com/gearcalc/
What it Does
The gear calculator provides a way of comparing different gear setups on a bike. There’s two main ways of measuring a bike gear, both of which are variants of the same thing:
- Effective Wheel Size
- Gear Development
Effective Wheel Size is based on the diameter of a wheel which will give the same forward movement as one rotation of the cranks. It’s based on the concept of a high-wheel or ‘Penny Farthing’ type bicycle, where the wheel is directly connected to the pedals.
Gear Development is simply the distance that the bike will move forward on one turn of the cranks. It’s the circumference of the wheel calculated in the Effective Wheel Size calculation.
Both of these calculations use the circumference of wheel and tyre. To calculate this, we assume that the tyre forms a perfect circle when inflated, and we use this with the wheel’s bead diameter as follows:
Circum = (Wheel Dia + (2 * Tyre Dia)) * Pi
The actual wheel circumference will vary slightly, depending on the width of the wheel, the condition & pressure of the tyres, and whether the manufacturer’s size is accurate.
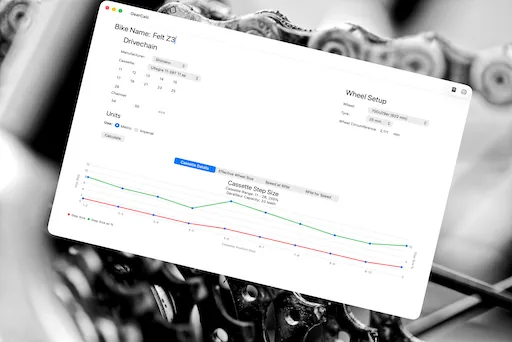
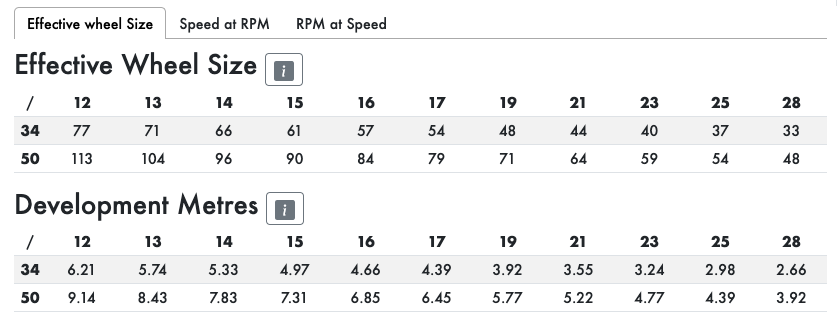
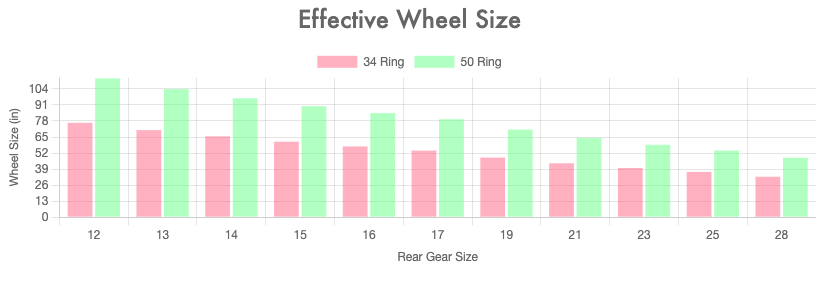
The results of these are shown in both a table and on a bar graph that lets you get a visual impression of your bike’s gearing range.
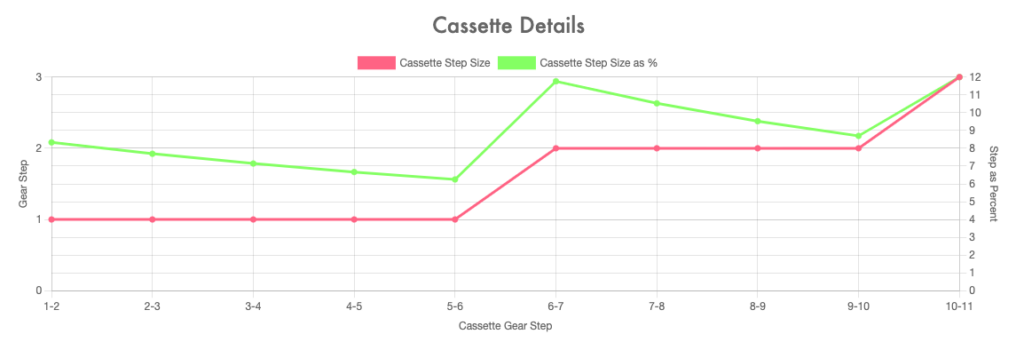
There’s another graph that illustrates the cassette’s gear spacing. This shows the ‘jump’ between each gear, both as an absolute number, and as a percentage of the smaller gear. I’m not sure where this idea originates from, but I first saw it in Campagnolo‘s catalogues.
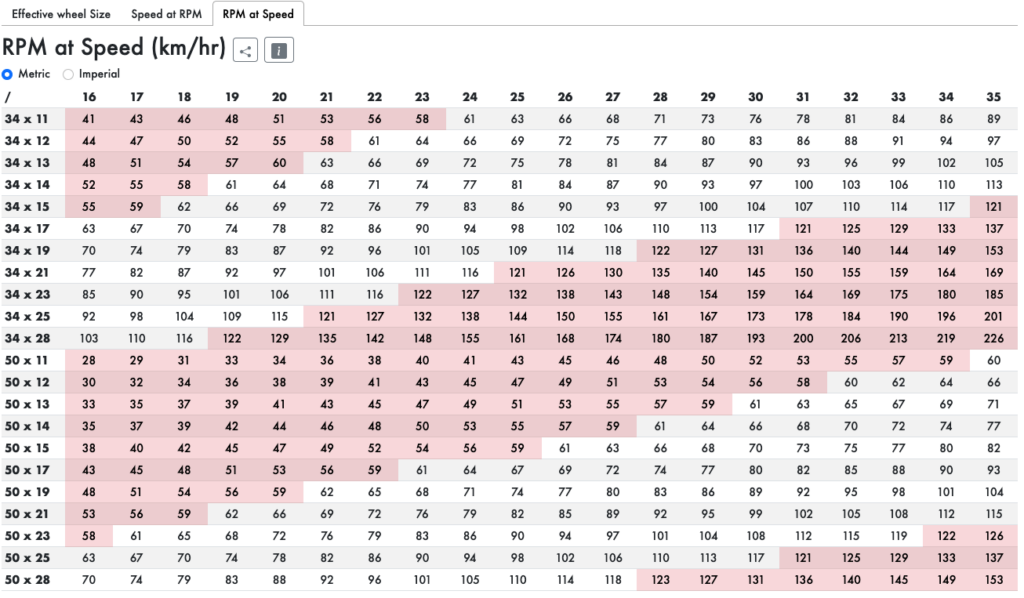
I’ve used the data calculated above to give a ‘real-world’ feel with two tables that show the speed attained at a particular crank cadence, and the cadence required to attain a particular speed in each gear combination. Cadence outside the ‘normal’ range (I’ve used less than 60 rpm or more than 120 rpm as the range to a ‘normal’ cyclist) are shown in red. This data can also be exported in csv format to use in other applications.
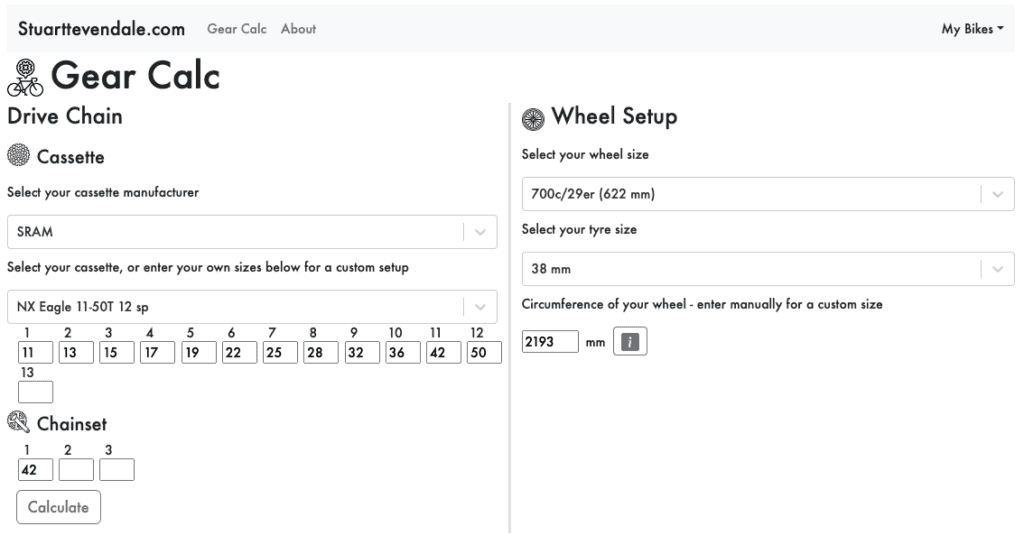
How it Works
To display the data for your bike’s particular setup, enter the manufacturer and type of your cassette, chainring sizes, wheel size and tyre diameter. Then, click the ‘Calculate’ Button.
I’ve tried to include the most common wheel and tyre sizes in the dropdown, but if your’s isn’t there, you can measure the circumference of your wheel and enter that in the circumference field. Similarly, I’ve tried to include most manufacturers cassette data in the cassette dropdown, but, if your’s isn’t there, you can enter the cog sizes in the fields. For the chainsets, you’ll need to enter the gear sizes your using as there’s just too much variation to include all manufacturer’s sizes.
I’ll try to keep the site’s data up-to-date with new manufacturer’s cassette releases, although no promises!
If you’re comparing different setups for your bike, it’s important to bear in mind that some cassettes may use specific free hubs, and some may be designed to work only in specific x1 or x2 setups.
Saving a Bike
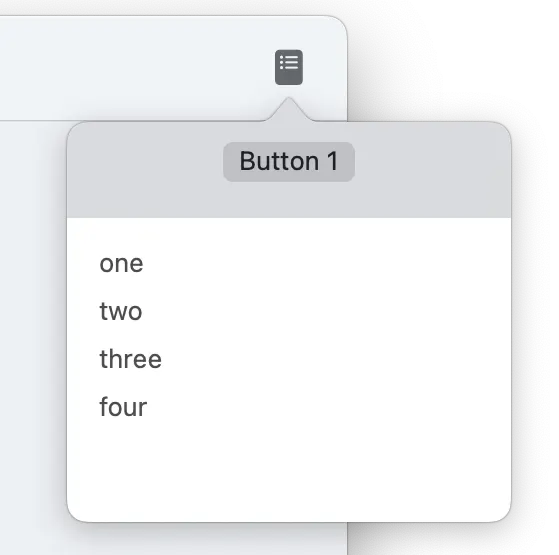
You can save the set of inputs you’ve used as a bike. To do this, go to the ‘My Bikes’ menu on the right-hand of the app, and select save bike with current setting. You’ll be prompted for a name, and the bike will then appear in the ‘My Bikes’ menu. The ‘Manage Bikes’ option lets you delete a saved bike.
The bikes are stored in your browser’s cookies. If you switch between browsers, your bikes will only show up in the browser you used to save them. You’ll also lose your bike fit you clear your browser’s cookies.
GearCalc in Action
About GearCalc
GearCalc came about as a result of spending some time recently brushing up my Javascript and React skills.
I picked a simple project, a bicycle gear calculator, for this. The maths involved is simple, the concepts are well defined, and there’s a scope for new, useful ways to display the results.
The app uses Javascript, React, Chart.js and Bootstrap.
The icons used are from by Juraj Sedlák at the Noun Project (CCBY3.0).
Other Gear Calculators
There’s many other Gear Calculators on the internet, and my app doesn’t do anything particularly unique or innovative.
Sheldon Brown’s site has a great calculator, and he also proposed an additional calculation method called Gain Ratio that took crank length into account. I haven’t used that here, but I may revisit later and add it as an option.
Roy Walter also has a good calculator here: https://www.machars.net/bikecalc.htm, along with some calculators for rowers.
https://www.bikecalc.com/ also provides the same calculations, and includes some good explanations of the various terms used.
If you’re a bike packer or gravel rider, https://ridefar.info/bike/components/gear-ratios/ provides some good insights into how to choose your gear setup.
Versions
V1.0.0 – Initial Release
V1.0.1 – Fix for bug that resulted in Fixed crash the resulted in a blank page when the page was left and revisted