iMovie and GoPro Quickstart – Part 2, Putting it Together
Putting Your Movie Together
Building your movie is basically three steps:
- Select the clips you want to use
- Drag these (or a portion of them) into your movie timeline
- Add in transitions, titles, photos and audio.
This post covers the first two of these, and a subsequent post will cover part 3.
Creating a New Project
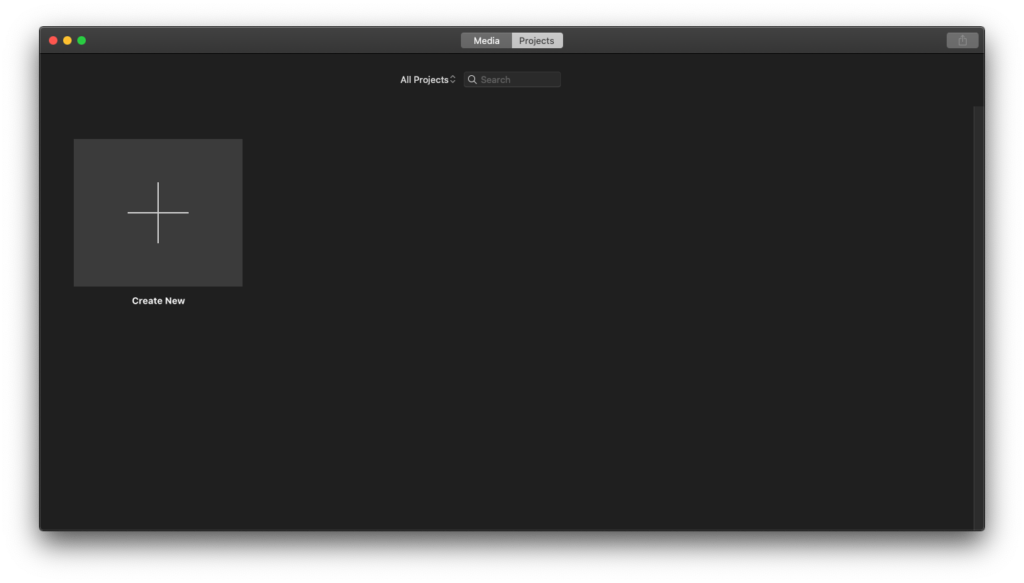
Before you can compile your clips into a complete movie, you’ll need to create a new project in the Project tab using the Create New button. You’ll get the choice to create a Movie or a Trailer. Here we’ll concentrate on the Movie option.
Selecting a Portion of a Clip
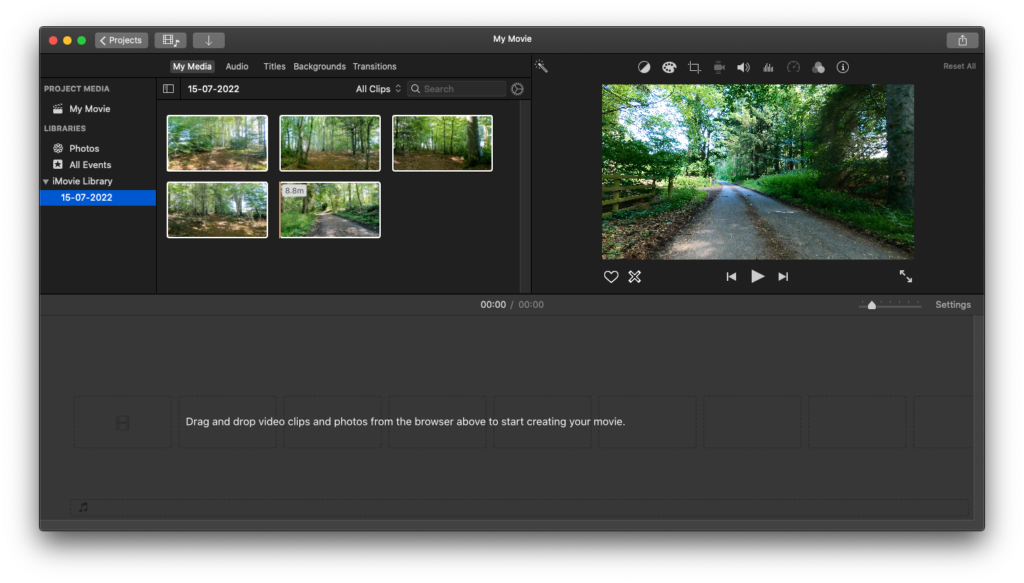
Unless you want to use each clip in its entirety, you’ll need to select a portion of each clip to add to your movie. There’s several different ways to do this.
Use the Entire Clip
If you want to use an entire clip, just drag the clip to the movie timeline.
Dragging Selection Handles
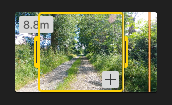
When you select a clip in the Media panel, you’ll see a yellow handle at each end of the clip. Drag these handles to mark the start and end of the portion of the clip. You’ll see a yellow border around the selected region. As you drag each handle, you’ll see the current frame shown in the right-hand playback panel.
Using Cursor Keys
If you want to make a more precise selection of start and end points, you can move the cursor through the clip using the left and right arrow keys to move one frame at a time. Holding down the Shift key when using the arrow keys jumps several frames. Use I key to mark the start of the selection (the In point) and the O key to mark the end of the selection (the Out point). If you’ve zoomed in to make the clips appear longer in the Media Panel (see my last post), then it’s easier to make a more exact selection.
Skimming with the Mouse Cursor
You can also ‘skim’ over the clip, using the mouse cursor, and make your selection again using the I and O keys. You’ll see the part of the clip you’re over in the playback window.
Previewing Your Selection
The view the portion of the clip you’ve selected, press the / button on the keyboard. Pressing the Spacebar on the keyboard will stop and start the playback.
Adding a Clip to Your Movie
Once you’ve made a selection, click the + button in the corner to add it to the end of your movie timeline. Alternatively, you can drag it to the timeline – this gives you the option of inserting it between existing clips in the timeline.
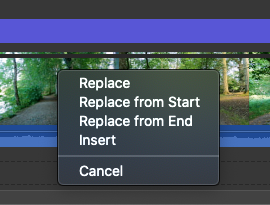
If you drag a clip and drop it OVER an existing clip in your movie timeline, you’ll get a popup menu that lets you either replace the existing Clip, or insert your new clip in the middle of the current clip at the point you dropped it.
If your new selection is a different length to the clip you’re dropping it over, then the Replace From Start and Replace from End options using the start or end of the clip as the ‘anchor’ point for the new clip, and the clip extended or trimmed as necessary.
After a clip has been added to the project timeline, you’ll see an orange bar indicating the portion of the clip that has been used. If you don’t see the orange bar, go to Used Media Ranges in the View menu and select it.
Movie Settings
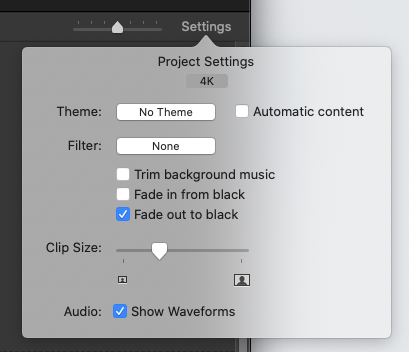
You can change how your movie looks in the project panel using the Settings button at the right-hand end of the panel, next to the slider control. Moving the slider will change the length of the clips in the project panel, making it easier to skim over shorter ones.
In the Settings popup dialog, you’ll be able to change the height of the clips, using the Clip Size slider. You can also apply a theme or visual filter to your clips. In the middle of the dialog, there’s a couple of checkboxes that will fade your movie in from black at the start and out to black at the end. These are quite useful as your movie fades to black, rather than just coming to a stop at the last frame.
Previewing Your Movie
You can view your current movie by clicking on the Play button and it will play in the right-hand panel.
Controls
- Pressing \ plays your movie from the start.
- Pressing / plays the currently selected clip.
- Pressing the spacebar stops and starts the playback.
Exporting
Preview
Once you’ve assembled the various parts of your movie, you can preview the finished article in the playback window. Drag the playback marker to the start of your movie timeline, then click the play icon in the playback window. Alternatively, you can press the spacebar to start playback.
Exporting to a File
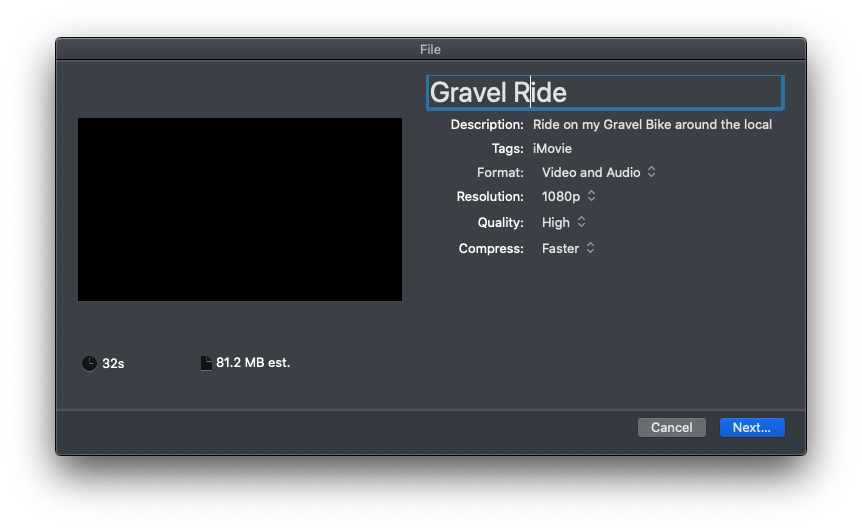
Finally, you can export your movie to a file or an online service. You can either select Share from the File menu, or click on the Share button at the right-hand end of the title bar. You’ll see options to share your video via email, YouTube and Facebook, or to export as a file. In all cases, you’ll see a dialog box displayed that will let you change the export settings for your movie. For the email and YouTube/Facebook options, you’ll only be able to set the resolution of the files that’s created. However, if you select the option to export as a file, you’ll have maximum control over the file options, including resolution, quality and compression speed. The options selected will determine the size and the quality of the final video file, and also how long it takes to export.
You can also enter a title, description and tags that will be stored in the metadata of the file. If you’ve chosen the email option, iMovie will open your email application and create a new message with the video file attached.
Once you click the Next button, you’ll be asked for a filename and location to save the file.
Once you’ve selected the setting for the file export, you’ll see the progress of the file export showing in the title bar as a wheel that fills in as the export progresses.
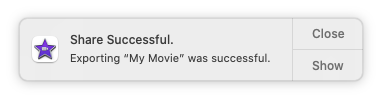
Once the export has completed, you’ll see a notification pop up. Click on ‘Show’ will open a Finder window with the location of your newly-exported movie.
This covers the basics of putting together a movie in iMovie. In my next post, I’ll cover some of the more advanced topics, such as adjusting the colour balance, adding audio and visual filters and changing the speed of clips.
In the next post, I’ll describe how to add titles, transitions and audio.